Subway Tiles For Kitchen Walls
Your kitchen walls witness everything from hurried weekday breakfasts to elaborate weekend dinner preparations. They endure steam, splashes, and heat while anchoring your space's visual identity. Choosing materials that balance durability with beauty becomes essential, and that's where the enduring appeal of classic rectangular tiles shines.
These porcelain and ceramic solutions have graced kitchens for over a century, evolving from utilitarian necessity to design centerpiece without losing their practical edge. Our kitchen wall tile collections honor this heritage while embracing contemporary innovation, giving you choices that work as hard as you do.
View our Complete Subway Tile Selection
Color Options That Define Your Space
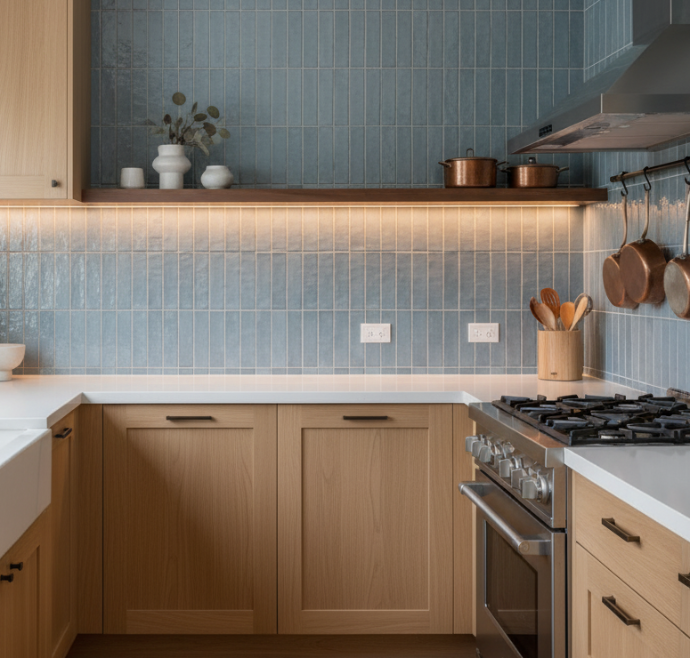
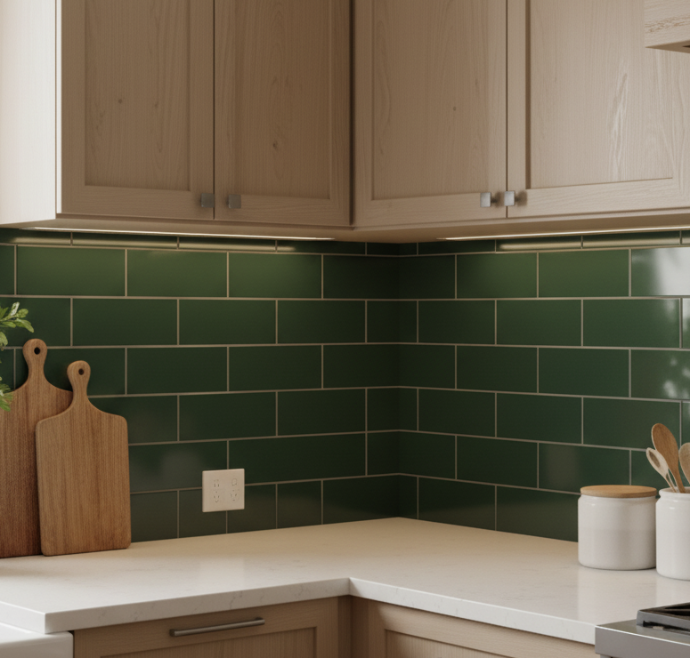
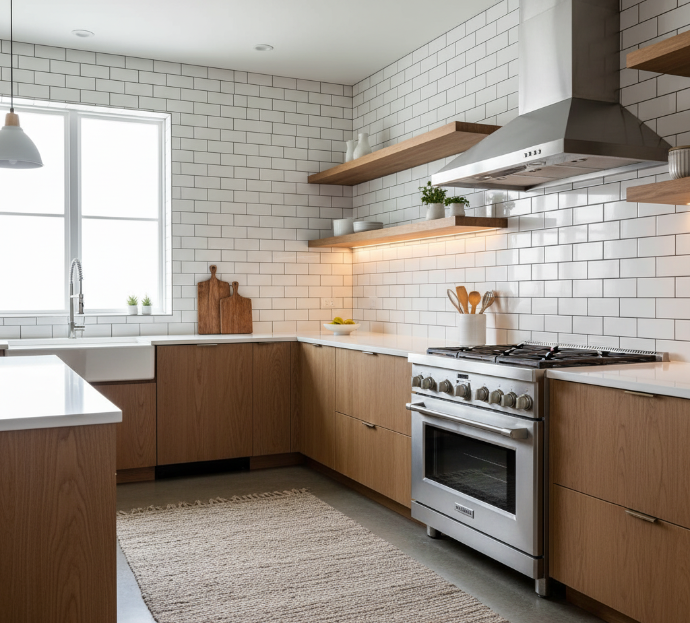
White subway tiles for kitchen walls dominate design conversations for reasons beyond trend, they genuinely transform how spaces feel. Light bounces differently in a white-tiled kitchen, making compact layouts breathe easier and creating backdrops that let your cookware and personal touches take center stage. But stepping beyond white unlocks personality. Warm grays bridge traditional and modern sensibilities, while deep navy or forest green anchor spaces with confident sophistication.
Pastels have surged among homeowners seeking something softer than stark white yet more interesting than beige. Sage green pairs beautifully with natural wood tones and brass fixtures, creating spaces that feel collected rather than decorated. Blush brings unexpected warmth, while powder blue channels vintage charm that feels fresh again. Two-tone installations create visual interest where darker tiles ground the lower portion while lighter shades rise toward the ceiling.
Finishes
That Perform
Glossy tiles catch morning sunlight and evening pendant glow differently than their matte counterparts, and that difference matters. The reflective quality amplifies whatever light exists, particularly valuable in kitchens where windows compete with upper cabinets for wall space.
Matte finishes tell a different story. They absorb rather than reflect, creating depth that glossy surfaces can't replicate, though they need slightly more intentional care when grease accumulates. Satin finishes split the difference, they catch just enough light to feel alive without mirror-bright intensity.
Subway tile texture introduces another dimension entirely. Beveled edges create shadow lines that shift throughout the day as light angles change, turning flat walls into dynamic surfaces. Behind cooktops where grease travels, smooth surfaces make more sense. On feature walls away from the action, texture can shine without complicating maintenance. Explore how different finishes perform at shop tiles by type, where you can evaluate options beyond flat photographs.
Easy Installation Process
The beauty of subway tiles for kitchen walls lies partly in their approachability. Unlike large-format tiles requiring perfect substrates and expert handling, the standard 3x6 size forgives minor inconsistencies while delivering professional results. Running bond practically installs itself once you establish your starting point and maintain level. Herringbone demands more planning but creates movement that transforms ordinary backsplashes into focal points.
Surface preparation determines everything that follows. Clean walls thoroughly, removing grease film that might compromise adhesion. Patch holes so tiles sit flat rather than telegraphing wall flaws. Behind ranges and near sinks, cement backer board protects against heat and moisture better than drywall alone.
Thin-set adhesive applied with a notched trowel creates the bond between wall and tile. Work in sections small enough to complete before the adhesive skins over typically two or three square feet at a time. Press each tile with a slight twist, using spacers to maintain consistent gaps that accommodate natural expansion. Check level frequently, adjusting tiles before the adhesive sets.
The rhythm develops quickly: spread adhesive, set tiles, check level, repeat. What seems daunting during planning becomes meditative during execution. Subway tiles for kitchen walls reward patience more than speed, and most homeowners find the process satisfying. The weekend you invest returns value every time you step into your kitchen and see walls that reflect your vision made real.
Frequently Asked Questions
The best finish depends on your kitchen's lighting and maintenance preferences. Glossy finishes reflect light beautifully and clean easily, making them ideal for compact kitchens or spaces with limited natural light where brightness matters. Matte finishes offer contemporary sophistication with reduced glare and hide water spots better than glossy surfaces, though they may require slightly more effort to clean grease and cooking residue. Semi-gloss finishes provide the balanced middle ground, offering easier cleaning than matte while showing fewer fingerprints and water spots than high-gloss options. For busy kitchens with heavy cooking, semi-gloss or glossy finishes typically perform best due to their superior cleanability.
The decision depends on your design goals, budget, and practical needs. Partial backsplashes extending from countertop to upper cabinets provide essential protection in food preparation zones and represent the most cost-effective option while meeting functional requirements. Full wall coverage from floor to ceiling creates dramatic visual impact and works beautifully in open-concept kitchens where walls serve as design features, though this requires more materials and installation time. Strategic accent walls using subway tiles can add personality to dining areas or breakfast nooks without the expense of tiling every surface. Consider moisture exposure, cooking habits, and whether walls need protection or primarily serve decorative purposes.
Running bond pattern, where tiles are staggered like bricks, offers the most straightforward installation with classic appeal that creates horizontal movement making kitchens appear wider. This pattern works universally well and costs less to install due to simpler cutting requirements. Herringbone pattern, where tiles are arranged in V-shaped zigzag formations, creates more visual interest and dynamic energy but requires precise cutting and alignment, increasing installation complexity and labor costs. Choose running bond for timeless simplicity and budget-conscious projects, or herringbone when you want your walls to serve as focal points and have budget flexibility for more intricate installation.
Experienced DIYers can successfully install subway tiles on kitchen walls, particularly for straightforward running bond patterns on small areas like backsplashes. The process requires proper substrate preparation, correct thin-set mortar application, and attention to spacing and alignment. However, professional installation offers advantages for larger projects, complex patterns like herringbone or basket weave, areas requiring precise cuts around outlets and fixtures, or situations where perfect alignment matters for aesthetic reasons. Professionals also ensure proper waterproofing in areas behind sinks where moisture exposure increases. Consider your skill level, available time, and the project's complexity when deciding between DIY and professional installation.
Maintain grout lines by applying quality grout sealer after installation once grout fully cures, then resealing periodically according to manufacturer recommendations to prevent staining and discoloration. Clean grout regularly using pH-neutral cleaners and soft brushes, avoiding harsh chemicals that degrade sealer or damage grout integrity. Modern grout technologies offer stain-resistant formulations that minimize maintenance demands compared to traditional grout. For stubborn stains, use grout-specific cleaners rather than abrasive tools that can scratch tiles or erode grout. Proper sealing and routine cleaning prevent most grout problems, though heavily used areas may eventually require professional grout renewal to restore original appearance.