Subway tile installation typically costs between $7 to $25 per square foot, including materials and labor, with the final price depending on tile quality, installation pattern complexity, and your location. This classic design choice has maintained its popularity for over a century, and understanding the investment required helps homeowners make informed decisions about their renovation projects.
If you're planning a kitchen backsplash or bathroom renovation, subway tiles offer timeless appeal and remarkable versatility. From traditional white ceramic to contemporary colored subway tile options, these rectangular beauties can transform any space. But what should you actually budget for your project? Whether you're exploring modern subway tile patterns like chevron or herringbone subway tile backsplash designs, or sticking with classic horizontal layouts, the costs can vary significantly. This comprehensive guide breaks down everything from material expenses to labor rates, helping you plan your budget while discovering creative backsplash ideas that match your style and financial goals.
Understanding Subway Tile Installation Costs
Basic Cost Breakdown
The total investment for subway tile installation comprises several components that work together to determine your final price tag. Material costs typically represent 40-50% of your total budget, while professional labor accounts for the remaining portion. According to Grand View Research, the ceramic tiles market continues to grow as homeowners recognize the value of quality tile installations.
Average Cost Ranges by Project Type:
- Small bathroom backsplash (15-20 sq ft): $105-$500
- Kitchen backsplash (30-40 sq ft): $210-$1,000
- Full bathroom wall (60-80 sq ft): $420-$2,000
- Shower surround (100-120 sq ft): $700-$3,000
These estimates include standard 3x6 inch tiles in basic white or neutral colors. Premium options like glossy ceramic subway tiles or porcelain varieties can push costs toward the higher end of the spectrum.
Material Cost Factors
Your choice of subway tile dramatically impacts your budget. Basic ceramic tiles start at $1-$3 per square foot, while premium porcelain or glass options can reach $15-$25 per square foot before installation. The type of material you select influences not only aesthetics but also durability and maintenance requirements.
Cost Comparison by Material Type:
Material Type | Cost per Sq Ft (Material Only) | Durability Rating | Best Use Case |
Basic Ceramic | $1-$3 | Good | Low-traffic backsplashes |
Premium Ceramic | $3-$8 | Very Good | Kitchen backsplashes |
Standard Porcelain | $5-$12 | Excellent | Bathrooms, showers |
Premium Porcelain | $10-$20 | Exceptional | High-end installations |
Glass Subway Tile | $15-$25 | Good (requires care) | Accent areas |
When browsing through tiles by type, consider how each material performs in your specific application. Ceramic options work beautifully for backsplashes, while porcelain tiles excel in moisture-prone environments like showers.
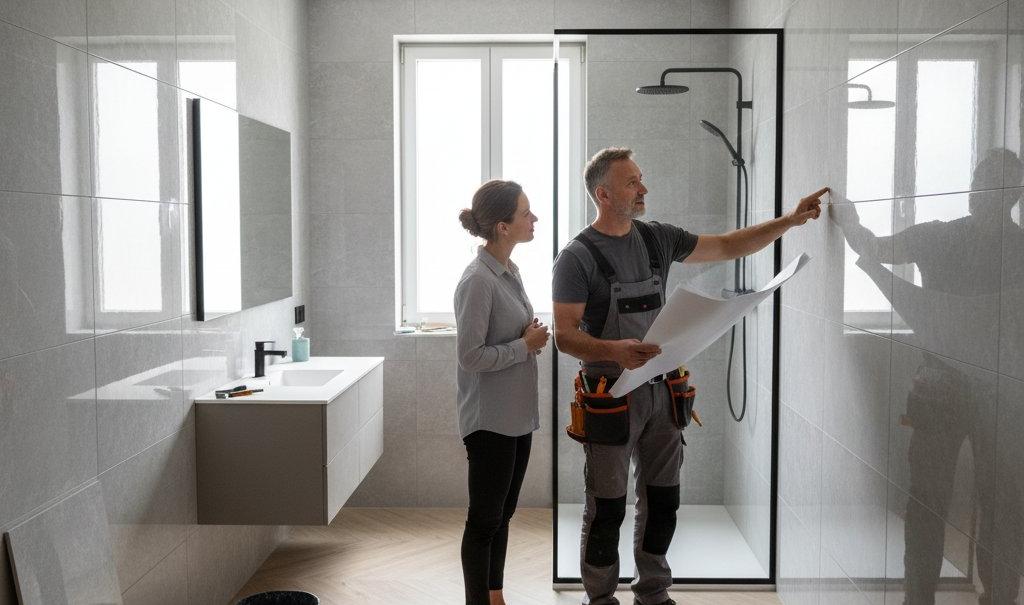
Labor Costs and Installation Complexity
Professional Installation Rates
Professional tile installers typically charge between $4 to $15 per square foot for labor, depending on your geographic location and the project's complexity. The Ceramic Tile Foundation provides extensive resources on understanding quality tile installation standards.
Urban areas with higher costs of living often see rates at the upper end of this range, while rural regions may offer more competitive pricing. The installer's experience level also matters. A certified professional through the Ceramic Tile Education Foundation's installer program brings expertise that prevents costly mistakes, ensuring your investment stands the test of time.
Pattern Complexity and Labor Costs
Here's where subway tile layouts get interesting and your budget can shift significantly. The installation pattern you choose directly affects labor time and, consequently, your costs.
Standard horizontal layout (the classic stacked or running bond pattern) represents the most cost-effective option, requiring minimal cuts and straightforward installation. This timeless arrangement costs approximately $4-$7 per square foot for labor.
Vertical subway tile creates a contemporary, height-enhancing effect but requires more precision during installation. Expect to pay $6-$9 per square foot for professional installation due to the increased attention to alignment and spacing.
Herringbone subway tile backsplash patterns demand significant expertise and time. Each tile requires precise 45-degree cuts and careful placement to maintain the zigzag pattern's integrity. Labor costs typically range from $10-$15 per square foot. The stunning visual impact often justifies the premium, especially in focal areas like kitchen backsplashes.
Chevron subway tile patterns require even more precision than herringbone, as tiles must be cut at angles before installation. This pattern creates a sophisticated, arrow-like design but commands $12-$18 per square foot in labor costs.
Basketweave subway tile arrangements combine horizontal and vertical orientations to create a woven appearance. This pattern requires approximately $8-$12 per square foot for installation, offering visual interest at a moderate price increase.
Additional Installation Expenses
Surface Preparation and Materials
Before any tile touches your wall, proper preparation ensures lasting results. Surface preparation costs often catch homeowners off guard but remain essential for quality installations. Budget $2-$5 per square foot for wall preparation, which includes removing old tile (if applicable), repairing damage, and ensuring a level surface.
Essential Installation Materials:
- Thin-set mortar: $25-$40 per 50-pound bag (covers 50-90 sq ft)
- Grout: $15-$30 per bag (choose from sanded or un-sanded)
- Tile spacers: $5-$10
- Waterproofing membrane (for wet areas): $1-$2 per sq ft
- Backerboard (if needed): $0.50-$1.50 per sq ft
Subway tile with dark grout has surged in popularity recently, creating dramatic contrast in contemporary designs. While grout color itself doesn't significantly impact cost, choosing quality grout prevents premature discoloration and cracking. This Old House offers excellent guidance on tile replacement and maintenance.
Specialty Finishes and Trim
Don't overlook the finishing touches that give your installation a polished, professional appearance. Bullnose tiles for edges cost $2-$8 per linear foot, while decorative borders or mosaic accent tiles add $15-$50 per square foot depending on intricacy.
Corner and edge trim pieces prevent exposed tile edges and provide clean transitions between surfaces. Budget approximately 10-15% extra for trim materials based on your project's perimeter measurements.
DIY vs. Professional Installation: A Cost Analysis
Weighing Your Options
Pros of DIY Subway Tile Installation:
- Save 40-60% on labor costs
- Complete flexibility with timeline
- Personal satisfaction and skill development
- Control over every installation detail
- Ability to work in stages around your schedule
Cons of DIY Subway Tile Installation:
- Time-intensive learning curve
- Risk of costly mistakes requiring professional correction
- Need to purchase or rent specialized tools ($200-$400)
- Physical demands of repetitive work
- Warranty concerns if improper installation leads to failure
- Potential for uneven results without experience
Most homeowners successfully tackle small backsplash projects (20-30 square feet) with basic skills and patience. Larger projects or complex patterns typically benefit from professional expertise. As noted in home renovation guides, understanding your limitations prevents expensive do-overs.
Step-by-Step: Planning Your DIY Subway Tile Budget
Step 1:
Measure and Calculate Materials Measure your installation area carefully, then add 10-15% extra for cuts, breakage, and future repairs. Use the square footage to estimate tile boxes needed, considering each box's coverage.
Step 2:
Purchase Quality Tools Invest in a reliable tile cutter ($50-$150), notched trowel ($15-$25), rubber grout float ($10-$15), and level ($20-$40). These tools ensure professional-looking results and serve multiple projects.
Step 3:
Research Proper Techniques Watch video tutorials or proper grouting methods and tile installation basics. Understanding proper thin-set mixing ratios and working times prevents common mistakes. Wikipedia's comprehensive tile overview provides historical and technical context.
Step 4:
Budget for Error Margin Allocate an additional 20-30% of your material budget for potential mistakes, especially for your first tile project. This buffer prevents mid-project store runs and stress.
Step 5:
Plan Your Timeline Block out adequate time for each phase: preparation (1-2 days), tile setting (2-4 days with drying time), and grouting (1-2 days). Rushing compromises quality.
Regional Cost Variations
Installation costs fluctuate significantly based on geographic location. Major metropolitan areas like New York, Los Angeles, and San Francisco see labor rates 30-50% higher than national averages. Conversely, smaller cities and rural areas often offer more competitive pricing.
Regional Labor Rate Averages:
- Northeast urban areas: $12-$18 per sq ft
- West Coast cities: $10-$16 per sq ft
- Midwest and South: $6-$12 per sq ft
- Rural areas: $4-$8 per sq ft
Material costs remain relatively consistent nationwide thanks to online shopping options. Visiting a local tile showroom allows you to see products in person while supporting local businesses.
Maximizing Value: Design Choices That Impact Cost
Creative Backsplash Ideas Within Budget
Your design vision doesn't need to break the bank. Strategic choices deliver stunning results while respecting your budget. Consider using premium tiles as accents within a field of standard options, or feature subway tile kitchen ideas that mix matte and glossy finishes for depth without doubling costs.
Budget-Friendly Design Strategies:
- Use standard 3x6 inch tiles in the main field, reserving specialty sizes for borders
- Select classic white or neutral colors (typically 20-30% less than colored options)
- Choose glossy finishes over specialty textures (easier to install and clean)
- Limit pattern complexity to focal areas rather than entire walls
- Mix subway tiles with complementary tile styles strategically
Trending Patterns and Their Worth
Current subway tile bathroom trends lean toward unexpected layouts and color combinations. Vertical installations elongate spaces, making small bathrooms feel larger. The investment in vertical subway tile ($2-$3 extra per square foot in labor) often pays dividends in perceived square footage.
Colored subway tile continues gaining traction as homeowners embrace personality in their spaces. Jewel tones like emerald, sapphire, and deep charcoal create dramatic statements, while pastels offer softer sophistication. Browse tiles organized by color to explore possibilities that resonate with your aesthetic.
The combination of white subway tile with dark grout remains a design staple, offering farmhouse charm or industrial edge depending on surrounding elements. This contrast costs no more than traditional white-on-white but delivers significantly more visual interest.
Hidden Costs to Consider
Unexpected Expenses
Several factors can inflate your initial budget estimate. Older homes often reveal surprises during demolition, such as water damage, outdated wiring, or inadequate wall backing. Budget a 15-20% contingency fund for unexpected discoveries.
Permit requirements vary by location and project scope. While backsplashes rarely need permits, bathroom renovations involving plumbing or electrical work typically do. Permit costs range from $50-$500 depending on jurisdiction and project complexity.
Disposal fees for old tile and materials add $100-$300 for most projects. Some home improvement centers offer discounted disposal services when you purchase materials through them.
Long-Term Value Considerations
Quality installation provides years of maintenance-free enjoyment and increases home value. Real estate professionals consistently note that updated kitchens and bathrooms with tile work yield strong returns on investment, typically recouping 70-80% of costs at resale.
Professional installations often include warranties covering workmanship for 1-3 years, protecting your investment against installation-related failures. This peace of mind justifies the professional installation premium for many homeowners.
Smart Shopping Strategies
Getting the Best Deal on Materials
Timing your purchase strategically saves money without sacrificing quality. Many tile retailers offer seasonal sales, particularly during holiday weekends and end-of-season clearances. Shopping online provides access to broader selections and competitive pricing, though shipping costs for heavy materials require consideration.
Order samples before committing to full quantities. Colors and textures appear differently in various lighting conditions, and the $5-$10 spent on samples prevents costly mistakes. Most retailers, including those carrying diverse product lines, offer sample programs.
Money-Saving Tips:
- Order 10-15% extra tiles during your initial purchase to ensure dye-lot matching for future repairs
- Check for discontinued colors or overstock deals (often 30-50% off)
- Consider larger format subway tiles (like 3x9 inch) which cover more area with fewer grout lines
- Bundle your tile purchase with other renovation materials for volume discounts
- Join retailer email lists for exclusive promotions and early sale access
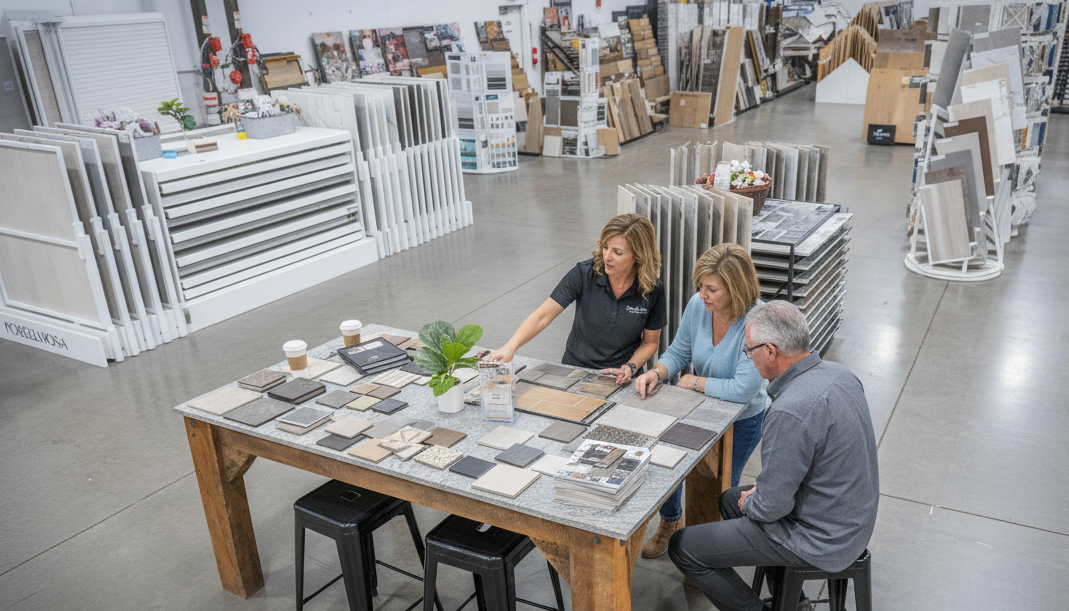
Selecting the Right Professional
Investing time in contractor selection prevents expensive problems. Request multiple quotes (ideally 3-5) and verify each contractor's licensing, insurance, and references. Price alone shouldn't determine your choice; experience with your specific tile type and pattern matters significantly.
Ask potential installers about their familiarity with the products you've selected and request photos of similar completed projects. A slightly higher upfront cost for experienced professionals often saves money by eliminating callbacks and repairs.
Establish clear communication regarding project timeline, material waste handling, daily cleanup expectations, and payment schedule. Reputable professionals provide detailed written estimates outlining all costs and potential variables.
Maintenance Costs and Longevity
Ongoing Investment
Subway tile requires minimal maintenance, contributing to its long-term value proposition. Regular cleaning with mild soap and water keeps tiles looking fresh for decades. Grout sealing every 1-2 years costs $50-$150 for professional application or $20-$30 for DIY, preventing stains and moisture penetration.
Quality installations last 20-50 years with proper care, making the per-year cost remarkably low. A $1,500 backsplash lasting 30 years costs just $50 annually, significantly less than many other design elements requiring regular updates.
Cracked or damaged tiles can be replaced individually without disturbing surrounding areas, provided you retained extras from your original purchase. This repairability distinguishes tile from other surface options requiring complete replacement when damaged. Resources like outdoor tile maintenance guides offer transferable insights for indoor applications.
Making Your Final Decision
Balancing quality, aesthetics, and budget requires careful consideration of your priorities. A well-executed subway tile installation enhances your daily living experience while protecting your investment through lasting durability. Whether you choose timeless white ceramic or embrace bold colored subway tile trends, understanding the complete cost picture empowers confident decision-making.
The enduring popularity of subway tiles stems from their remarkable versatility and proven performance across diverse applications. From modern subway tile patterns creating contemporary drama to classic layouts offering timeless sophistication, this design element adapts to virtually any style preference.
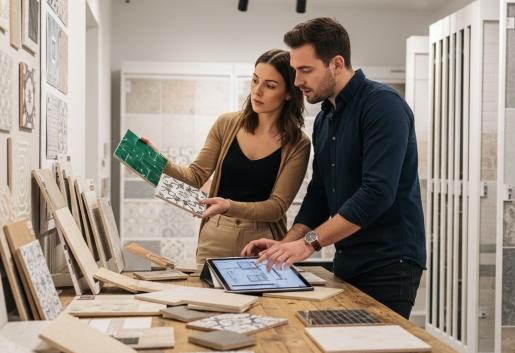
Ready to transform your space with beautiful subway tile? Explore our comprehensive tile collection featuring everything from traditional ceramic to premium porcelain options. Our knowledgeable team helps homeowners navigate choices, ensuring your selection aligns with both aesthetic vision and practical requirements. Contact us today to discuss your project and receive personalized guidance on creating the perfect tile installation for your home. Visit our showroom to see samples in person and experience the quality that sets us apart in the tile industry.
Frequently Asked Questions
How much does it cost to tile a 100 square foot backsplash with subway tiles?
A 100 square foot backsplash typically costs between $700-$2,500 total, including materials ($100-$800) and professional installation ($600-$1,700). Basic ceramic in a standard horizontal pattern falls at the lower end, while premium porcelain in complex patterns like herringbone reaches the upper range. DIY installation saves approximately 60% on labor costs.
Are subway tiles more expensive than regular tiles?
Subway tiles generally cost similarly to or slightly less than many other tile types. Basic subway tiles start at $1-$3 per square foot, making them among the most affordable options. Their rectangular shape and standardized sizing simplify installation compared to complex mosaics or large-format tiles, potentially reducing labor costs by 20-30%.
What is the cheapest way to install subway tiles?
The most economical approach combines DIY installation with standard ceramic tiles in a basic horizontal pattern. Purchase tiles during sales, use standard white or neutral colors, avoid complex patterns requiring extensive cuts, and handle installation yourself. This strategy reduces total project costs by 50-70% compared to professional installation with premium materials.
How long does subway tile installation take?
Professional installers typically complete a standard kitchen backsplash (30-40 sq ft) in 1-2 days, including surface preparation, tile setting, and grouting. Larger projects like shower surrounds require 3-5 days. DIY installations take 2-3 times longer due to learning curves and working around personal schedules. Complex patterns add 30-50% more time regardless of installer experience.
Does subway tile increase home value?
Yes, professionally installed subway tile typically increases home value and appeal to buyers. Kitchen and bathroom updates featuring quality tile work recoup 70-80% of costs at resale. Subway tile's timeless aesthetic appeals broadly to buyers, avoiding dated trends that might limit marketability. The durability and low maintenance requirements also attract potential purchasers.