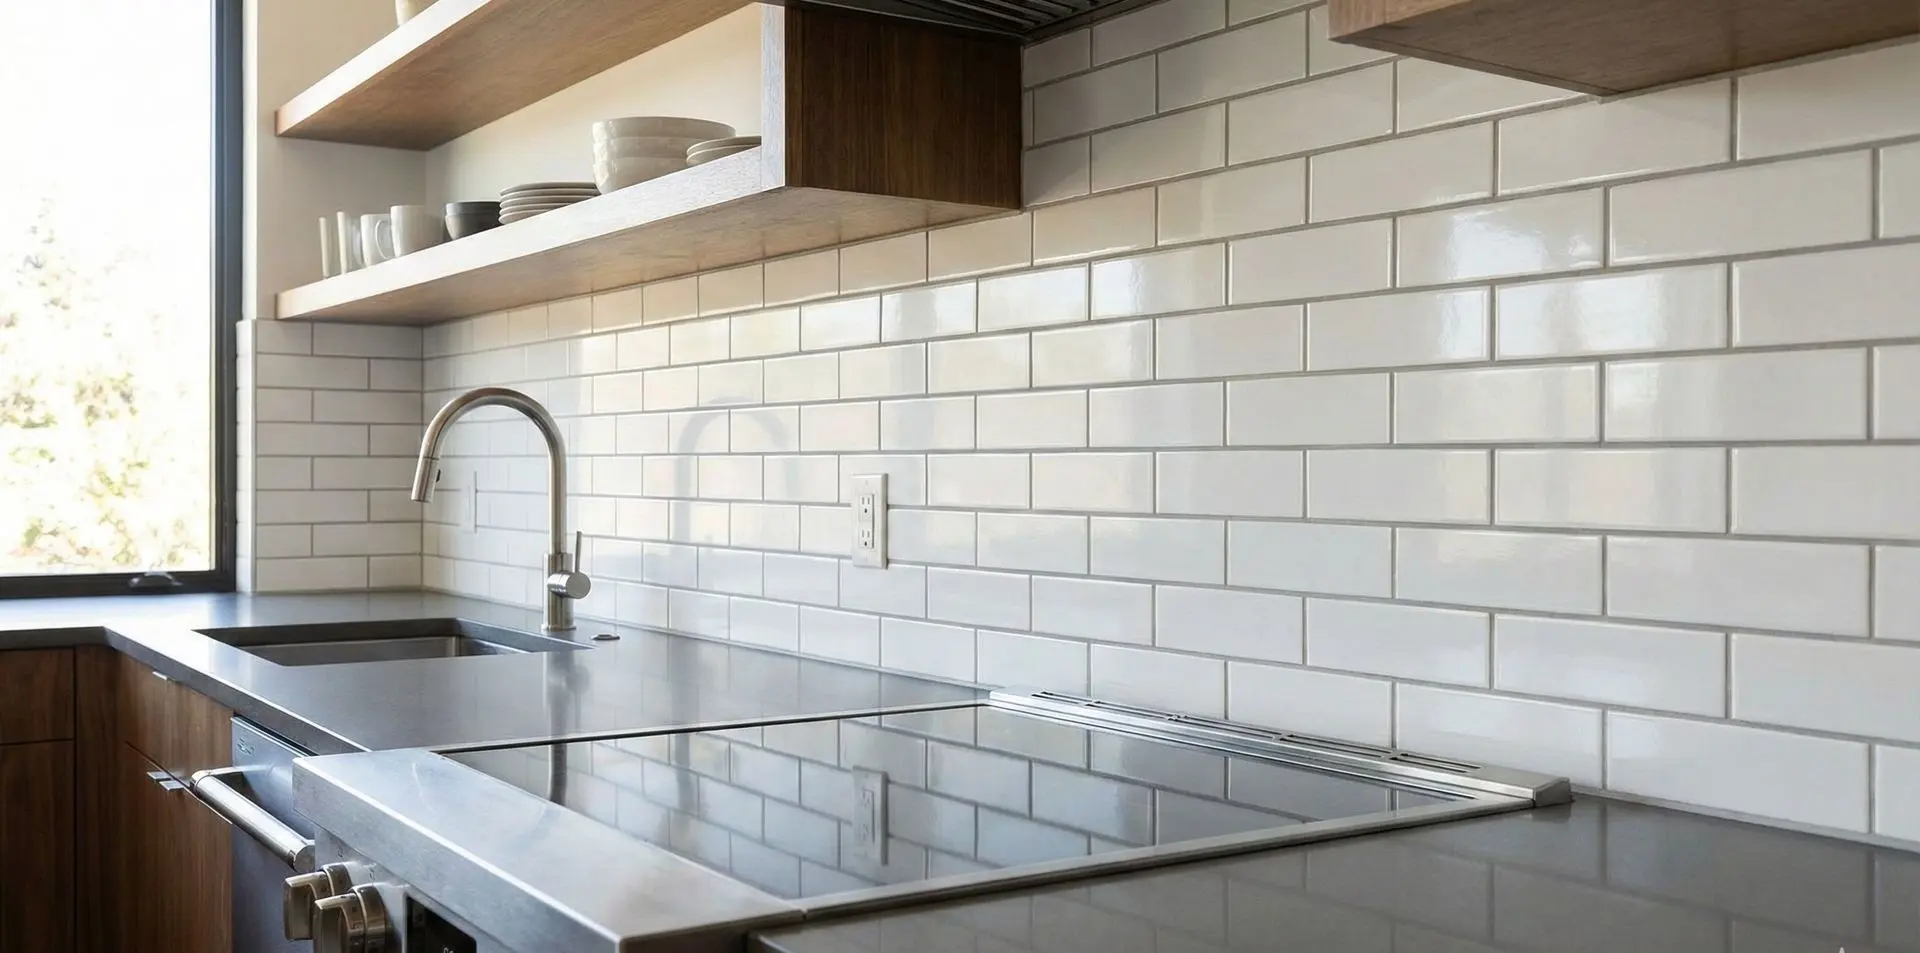
Subway tiles are rectangular ceramic or porcelain tiles that instantly transform kitchen backsplashes with their timeless appeal and versatile design options. Originally measuring 3x6 inches and named after New York City subway stations where they were first used in 1904, modern subway tiles now come in various sizes from 2x4 to 4x12 inches, multiple materials including ceramic, porcelain, marble, and glass, and offer endless layout patterns from classic brick to herringbone and vertical stack. Kitchen designers recommend subway tiles for backsplashes because they're water-resistant, easy to clean, budget-friendly at $0.50-$15 per square foot, and complement virtually any kitchen style from traditional to contemporary. The most popular subway tile backsplash ideas include classic white brick patterns, colored tiles for bold statements, textured finishes for visual depth, and creative layouts that break from traditional horizontal installations.
The Enduring Appeal of Subway Tiles in Modern Kitchens
Subway tiles have transcended their humble beginnings in public transportation to become one of the most sought-after materials in kitchen design. When you're looking to shop tiles by style, subway tiles consistently rank among the top choices for homeowners and designers alike. Their rectangular shape creates clean lines that work beautifully in both small galley kitchens and expansive chef's kitchens.
The beauty of subway tiles lies in their adaptability. Unlike trend-driven materials that quickly date a kitchen, subway tiles possess a chameleon-like quality that allows them to blend seamlessly with changing décor preferences. Whether you're renovating a Victorian-era home or designing a sleek modern apartment, these versatile tiles provide the perfect backdrop for your culinary space.
Classic White Subway Tiles: The Foundation of Timeless Design
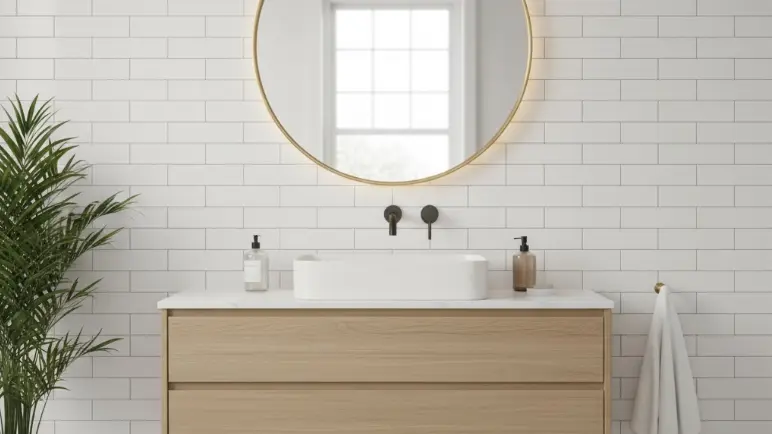
White subway tiles remain the gold standard for kitchen backsplashes, and for good reason. Their bright, reflective surface amplifies natural light, making even the smallest kitchens feel more spacious and inviting. The Imagine 3x12 Matte Porcelain Subway Tile exemplifies this classic choice with its contemporary matte finish that reduces glare while maintaining the crisp, clean aesthetic that makes white subway tiles so appealing.
When installing white subway tiles, consider the grout color as a design element in itself. White grout creates a seamless, monolithic look that emphasizes cleanliness and simplicity. Dark grout, particularly charcoal or black, adds graphic contrast and helps hide everyday wear while creating a more dramatic, grid-like pattern. Gray grout offers a middle ground, providing subtle definition without overwhelming the tile's natural beauty.
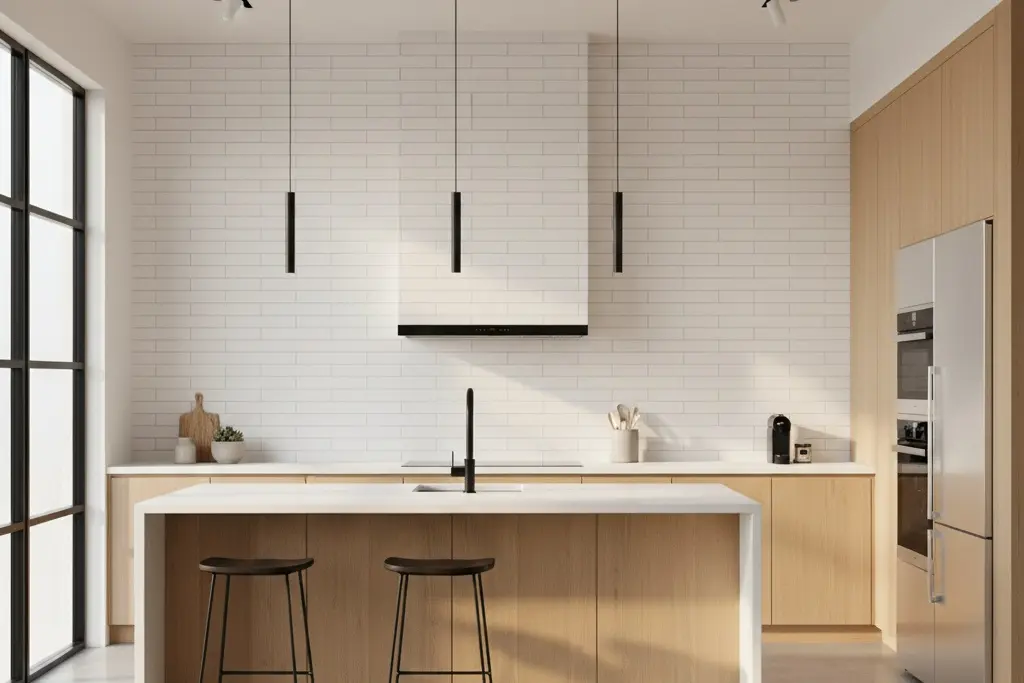
The installation pattern you choose can dramatically alter the visual impact of white subway tiles. The traditional brick pattern, also known as a running bond, creates horizontal movement that makes kitchens appear wider. For those seeking to shop tiles by size, consider how different dimensions affect the overall look-larger format tiles like 4x12 inches create fewer grout lines for a more contemporary feel, while smaller 2x4 tiles add vintage charm.
Bold Color Choices That Make a Statement
Moving beyond traditional white opens up exciting design possibilities. Colored subway tiles transform backsplashes from functional necessities into artistic focal points. Deep navy blues create sophistication when paired with brass fixtures and white cabinetry. Sage greens bring nature indoors, complementing wood tones and creating a calming atmosphere perfect for the heart of your home.
When selecting colored tiles, it's essential to shop tiles by color with your entire kitchen palette in mind. Rich jewel tones like emerald or sapphire work beautifully in kitchens with neutral cabinetry, while soft pastels complement vintage-inspired or cottage-style spaces. The key is achieving balance-let your colored backsplash be the star while keeping other elements more subdued.
Consider how natural and artificial light affects your chosen color throughout the day. North-facing kitchens benefit from warmer tones that counteract cool natural light, while south-facing spaces can handle cooler blues and greens without feeling cold. Understanding different types of tiles and their light-reflecting properties helps ensure your color choice looks stunning in all lighting conditions.

Texture and Finish: Adding Dimension to Your Backsplash
Texture transforms ordinary subway tiles into extraordinary design features. Beveled edges catch light differently throughout the day, creating subtle shadows and highlights that add visual interest without overwhelming the space. Handmade tiles with slight irregularities bring artisanal charm and warmth that mass-produced tiles can't replicate.
The Paradise 2x2 Mosaic Matte Concrete Look Porcelain Mosaic Tile demonstrates how texture and finish work together to create depth. Matte finishes reduce glare and hide water spots better than glossy surfaces, making them practical choices for busy kitchens. Glossy finishes reflect more light and create a sense of spaciousness but require more frequent cleaning to maintain their pristine appearance.
Crackle-glazed subway tiles add vintage character with their network of fine lines across the surface. These tiles work particularly well in farmhouse or traditional kitchens where a lived-in, comfortable aesthetic is desired. Three-dimensional tiles with raised patterns or wave-like surfaces create dramatic shadow play that serves as kitchen art when properly lit.
Creative Layout Patterns That Break the Mold
While the classic brick pattern remains popular, exploring alternative layouts can completely transform your subway tile backsplash. The herringbone pattern creates dynamic movement and sophistication, though it requires more tiles and precise cutting, making professional installation guides invaluable for DIY enthusiasts.
Vertical stacking creates a modern, streamlined look that draws the eye upward, making kitchens with low ceilings feel taller. This pattern works exceptionally well with larger format subway tiles and creates a contemporary grid that complements minimalist design schemes. The basket weave pattern, traditionally used for floors, brings unexpected texture to backsplashes when executed with contrasting grout colors.
For those ready to shop for unique options, consider mixing subway tiles with accent pieces. The Mozart 6in Hexagon Honed or Polished Marble Look Porcelain Tile can create stunning focal points when combined with subway tiles, perhaps as a decorative band or behind the stove as a feature area.
Material Matters: Choosing the Right Subway Tile for Your Needs
The material you choose affects both aesthetics and functionality. Ceramic subway tiles offer affordability and ease of maintenance, making them ideal for budget-conscious renovations. They're available in countless colors and finishes, and their durability makes them suitable for busy family kitchens. When you shop tiles by type, ceramic options provide excellent value without sacrificing style.
Porcelain subway tiles offer superior durability and water resistance compared to ceramic. They're ideal for backsplashes that extend to countertop edges or areas prone to moisture. Learning proper installation techniques for porcelain ensures longevity and prevents common issues like cracking or loosening over time.
Natural stone subway tiles, including marble, travertine, and limestone, bring luxury and unique veining patterns that make each installation one-of-a-kind. However, they require sealing and more careful maintenance. Glass subway tiles reflect light beautifully and come in translucent options that create depth, though they can chip more easily than ceramic or porcelain alternatives.
Grout Lines and Spacing: The Unsung Heroes of Design
Grout selection and spacing significantly impact your backsplash's final appearance. Thin grout lines (1/16 inch) create a more seamless look that emphasizes the tiles themselves, while wider spacing (1/8 to 1/4 inch) makes the pattern more prominent and can be more forgiving during installation. Calculating the right amount of tiles per square meter helps ensure you order enough material while accounting for spacing and cuts.
Epoxy grout, though more expensive and challenging to work with, offers superior stain resistance and doesn't require sealing-ideal for kitchen backsplashes exposed to food splatters and grease. Sanded grout works well for wider joints, while unsanded grout suits narrow spaces better. Color-matched caulk at corners and edges prevents cracking while maintaining visual continuity.
Extending Your Design: Full Wall Applications and Beyond
Taking subway tiles from backsplash to ceiling creates dramatic impact and eliminates the awkward transition line that can occur with standard 18-inch backsplashes. This approach works particularly well in kitchens with open shelving, where the continuous tile surface provides an easy-to-clean backdrop for displayed dishes and glassware.
Consider wrapping subway tiles around windows for a cohesive look that frames natural light beautifully. Adding decorative tile inserts within your subway tile field creates custom focal points without overwhelming the design. The Perfection 7x8 Hexagon Matte Porcelain Tile makes an excellent accent when integrated into a subway tile design.
Mixing Sizes and Shapes for Visual Interest
Combining different subway tile sizes creates rhythm and visual hierarchy. Large format tiles (4x12 or 4x16) work beautifully as the main field, with smaller tiles creating borders or accent bands. This approach adds complexity without introducing competing patterns or colors. Visit Nova Tile and Stone to explore the full range of size options available.
The Terrazzo 24x24 Matte Finish Porcelain Tile demonstrates how larger format tiles can complement subway tiles when used strategically, perhaps as a statement wall or coordinating floor treatment that ties the entire kitchen design together.
Edge Treatments and Finishing Touches
Proper edge treatment elevates your subway tile installation from amateur to professional. Bullnose tiles provide finished edges for outside corners and endpoints, creating smooth transitions that prevent chipping and snagging. Quarter-round trim pieces solve inside corners elegantly, while pencil liners add decorative borders that define different areas or create visual breaks in large installations.
Metal edge trim in finishes like brushed nickel, copper, or matte black adds contemporary flair while protecting tile edges. These details might seem minor, but they significantly impact the finished look's sophistication and durability. When you shop local, consult with experts about the best edge treatments for your specific installation.
Maintenance and Longevity Considerations
Choosing the right subway tile involves considering long-term maintenance requirements. Proper cleaning techniques for porcelain tiles ensure your backsplash maintains its beauty for years. Regular cleaning with pH-neutral cleaners prevents buildup that can dull surfaces and discolor grout.
Different materials require different care approaches. Glazed ceramic and porcelain tiles need only regular wiping with mild detergent, while natural stone requires periodic resealing to maintain stain resistance. Glass tiles show water spots more readily but clean easily with glass cleaner or vinegar solutions.
Budget-Friendly Updates Using Subway Tiles
Subway tiles offer exceptional value, allowing dramatic kitchen transformations without breaking the budget. Basic white ceramic subway tiles start at under $1 per square foot, making them accessible for any renovation budget. Even premium options like handmade or natural stone varieties typically cost less than many trendy alternatives while offering superior longevity.
Strategic use of expensive accent tiles within a field of affordable subway tiles creates high-end looks at a fraction of the cost. Consider splurging on a decorative band behind the stove while using budget-friendly options elsewhere. Understanding the products we carry helps you mix price points effectively.
Complementary Design Elements
Your subway tile backsplash should harmonize with other kitchen elements. Cabinet hardware in finishes that echo your grout color creates cohesion-black grout pairs beautifully with matte black pulls and faucets. Understanding current flooring trends helps ensure your backsplash complements rather than competes with other surfaces.
Lighting plays a crucial role in showcasing your subway tile backsplash. Under-cabinet LED strips eliminate shadows and highlight texture, while pendant lights create focal points that draw attention to beautiful tile work. Innovative tile designs that incorporate lighting show how tiles themselves can become part of your lighting scheme.
Historical Context and Modern Evolution
Understanding subway tiles' origins enriches appreciation for their enduring appeal. Originally designed for easy cleaning in New York's subway system, these tiles combined practicality with beauty-principles that remain relevant today. Modern manufacturing techniques have expanded possibilities while maintaining the classic proportions that make subway tiles so visually pleasing.
Today's subway tiles benefit from advanced glazing techniques that improve stain resistance and color consistency. Digital printing technology allows for tiles that mimic natural materials convincingly while offering superior performance characteristics. These innovations mean homeowners can achieve any desired aesthetic without compromising functionality.
Conclusion
Subway tiles continue to reign as the ultimate kitchen backsplash solution because they masterfully balance timeless appeal with contemporary versatility. Whether you choose classic white in a traditional brick pattern or explore bold colors and creative layouts, subway tiles provide the perfect canvas for expressing your personal style while ensuring lasting functionality. Their affordability, durability, and endless design possibilities make them an investment that pays dividends in both daily enjoyment and long-term home value.
The key to a successful subway tile backsplash lies in thoughtful planning-considering not just the tiles themselves but how they interact with grout, lighting, cabinetry, and your overall kitchen design. By understanding the various options available in materials, sizes, colors, and installation patterns, you can create a backsplash that not only protects your walls but becomes a stunning focal point that elevates your entire kitchen.
Ready to transform your kitchen? Contact us to explore our extensive collection and get expert advice on selecting the perfect subway tiles for your project. Learn more about us and discover why homeowners trust Nova Tile and Stone for their kitchen renovation needs.
Would you like more information
about a product?
Frequently Asked Questions
What size subway tile is best for a small kitchen?
For small kitchens, 3x6 inch subway tiles in white or light colors work best as they create an optimal balance between visual interest and spaciousness. The classic size doesn't overwhelm limited wall space while the rectangular shape creates horizontal lines that make the kitchen appear wider. Using a light-colored grout close to the tile color creates a seamless look that maximizes the perception of space. Avoid very large format tiles (4x12 or larger) in small kitchens as they can make the space feel disproportionate and require more cutting around obstacles.
How much does it typically cost to install a subway tile backsplash?
The total cost for a subway tile backsplash typically ranges from $600 to $1,300 for an average 30-square-foot installation. Material costs vary from $0.50 per square foot for basic ceramic to $15 per square foot for handmade or natural stone options. Professional installation adds $40-60 per hour or $10-15 per square foot. Additional costs include grout, adhesive, and edge treatments, which typically add $100-200 to the project. DIY installation can save 40-50% on labor costs but requires proper tools and techniques for professional results.
Can subway tiles be installed over existing tile backsplash?
Yes, subway tiles can be installed over existing tile backsplash if the current tiles are firmly attached, level, and in good condition. The existing surface must be thoroughly cleaned and roughened with sandpaper to ensure proper adhesion. However, this adds thickness to your backsplash which may create issues with outlets, switch plates, and the transition to your countertop. Most professionals recommend removing old tiles for the best results, as this allows inspection of the wall condition and ensures the new installation lasts longer without potential adhesion problems.
How do I choose the right grout color for my subway tiles?
Select grout color based on your desired visual effect: matching grout creates a seamless, monolithic look that emphasizes the overall surface rather than individual tiles, while contrasting grout highlights the tile pattern and creates graphic interest. White or light gray grout with white tiles offers a classic, clean appearance but requires more maintenance. Dark grout provides dramatic contrast and better hides staining but can make spaces feel smaller. Test grout colors by applying samples to a small tile section, as dried grout often appears lighter than when wet.
What's the best way to clean and maintain subway tile backsplashes?
Daily maintenance involves wiping tiles with a damp microfiber cloth to prevent buildup of grease and food splatters. Weekly cleaning should include using a pH-neutral cleaner or a mixture of warm water and dish soap, avoiding acidic cleaners that can damage grout over time. For tough stains, make a paste of baking soda and water, apply to the affected area, let sit for 10 minutes, then scrub gently with a soft brush. Seal grout annually to maintain stain resistance, and reseal natural stone tiles every 6-12 months depending on use.