Installing subway tiles is moderately challenging but achievable for most DIYers with proper preparation. The difficulty depends on three key factors: pattern complexity (straight stack is easiest, herringbone is hardest), surface condition (flat, clean walls are essential), and tile size (larger tiles are easier to install but require perfectly level surfaces).
Timeline expectations: DIY installation typically takes a full weekend or longer for a standard backsplash, while professionals complete the same project in 1-2 days. The most beginner friendly pattern is the straight stack, which arranges tiles in neat rows and columns without complex measurements.
Essential tools required: tile cutter, wet saw (for complex cuts), notched trowel, level, tile spacers, grout float, and cleaning sponge. Safety equipment like gloves and protective eyewear are necessary for handling sharp edges and adhesives.
Common DIY mistakes to avoid: inadequate surface preparation (the #1 error), inconsistent spacing, failing to use a level consistently, and not planning the layout beforehand. These mistakes result in crooked lines, uneven grout joints, and tiles that eventually come loose.
When to hire professionals: Complex patterns like herringbone, uneven surfaces requiring leveling, tight project deadlines, or when working with premium tiles. Professional installation eliminates costly mistakes and typically includes work guarantees.
Key success factors: proper surface preparation (clean, dry, level walls), choosing the right adhesive method (thin-set mortar vs. adhesive sheets), and understanding that accuracy and patience are more important than speed for achieving professional-looking results.
What Are Subway Tiles?
Subway tiles stand as a design foundation recognized for their neat, rectangular form generally 3x6 inches, providing a polished and classic appearance. Initially utilized in New York City's underground transit system during the early 1900s, these tiles gained recognition for their strength, simple care, and capacity to bounce light in poorly illuminated areas. Contemporary subway tiles have expanded to feature different materials such as ceramic tiles, glass, and natural stone, along with surface treatments from matte to high-gloss. Standard colors feature traditional white, gentle neutrals, and more vibrant tones for modern environments.
Subway Tile Installation Varieties
Picking the correct installation method improves both the visual appeal and practicality of subway tiles, forming the complete design concept. Among the most preferred selections is the straight stack arrangement, positioned in orderly rows and columns, providing a neat, simple appearance. By comparison, the traditional brick pattern, or running bond design, shifts tiles by half their width to copy classic masonry. For more texture and detailed design, the herringbone layout produces a chevron pattern, excellent for feature walls or kitchen backsplashes.
The vertical stack design positions tiles standing in direct lines, creating a refined and modern atmosphere. The metro layout, comparable to brick pattern, displays narrower grout joints and lightly angled edges, bringing out the appeal of traditional subway stations. A running bond modification shifts tiles by one-third, producing a lively yet harmonious look. Finally, the stacked design, organized in a grid arrangement, matches contemporary and industrial environments seamlessly.
Variables Influencing Installation Complexity
Compact subway tiles frequently require additional cuts and careful positioning, while bigger tiles can make the process smoother but need a completely flat surface for correct installation. Thin set adhesive provides a strong attachment but requires expertise to guarantee uniform coverage, while adhesive sheets are more beginner-friendly but might not function well on every surface.
A level, clean, and dry foundation is critical for success, since irregular walls or leftover paint can lead to positioning issues. Furthermore, detailed patterns such as herringbone or running bonds require precise measurements and exact cuts to reach a perfect result. While DIY enthusiasts can handle the project with determination and correct equipment, professionals provide knowledge that lowers the chance of mistakes, especially when dealing with complex designs or high-end tiles.
The DIY Installation Experience
Subway tiles might look easy to install, but handling the project as a DIY effort comes with its unique challenges and benefits. While certain homeowners enjoy the chance to personalize their area and cut costs, others discover the process intimidating.
Nevertheless, DIY installation needs a specific skill level and experience. If you're uncertain about your capacity to finish the project or if your area has complicated needs, it's always wise to speak with a professional to prevent expensive errors. Here's a thorough examination of the DIY journey, from its benefits to possible problems, equipment you'll require, and professional advice for success.
DIY Installation Benefits and Drawbacks
Choosing whether to handle a tile installation project personally involves both advantages and difficulties. While DIY can reduce costs and provide a feeling of achievement, it's crucial to consider the potential negatives before starting.
Benefits
- The clearest advantage of a DIY method is cutting labor expenses, which can represent a major part of a professional installation bill.
- Nothing compares to the satisfaction of looking back at completed work, knowing you accomplished it through your own effort.
- DIY provides you total design control. Whether it's trying distinctive layouts or incorporating a personal style, the creative control is unlimited.
- Finishing a DIY project builds a deeper emotional bond to your house, as you've put your time and energy into making something special.
Drawbacks
- Installing subway tiles isn't a simple weekend project, it needs careful planning, preparation, and implementation.
- Accuracy is crucial. Crooked lines or incorrect spacing can damage the final appearance.
- Typical errors include misaligned tiles, uneven grout lines, and incorrect adhesive use. Correcting these can be annoying and costly.
- Tile installation requires physical work and sharp equipment, raising the chance of back injury, cuts, or other accidents.
- Despite good intentions, lack of experience can result in expensive errors, particularly when using premium tiles from the products we carry.
Necessary Equipment for DIY Installation
A successful DIY tile installation begins with getting the proper tools for accuracy and effectiveness. One of the most crucial is a tile cutting tool for creating clean, precise cuts, while a wet saw is better suited for complex shapes or bigger projects. A serrated trowel makes adhesive application easier, forming a reliable connection between the tiles and the surface. To keep straight, uniform rows, a level tool is essential, and tile spacers ensure consistent spacing for grout.
After the tiles are placed, a grout spreader is used to push grout into the spaces for a smooth, finished appearance. A cleaning sponge is then essential for removing extra grout and cleaning the tiles, keeping them spotless. Finally, remember safety equipment like gloves and protective eyewear, which are necessary for safely handling sharp edges and adhesive materials.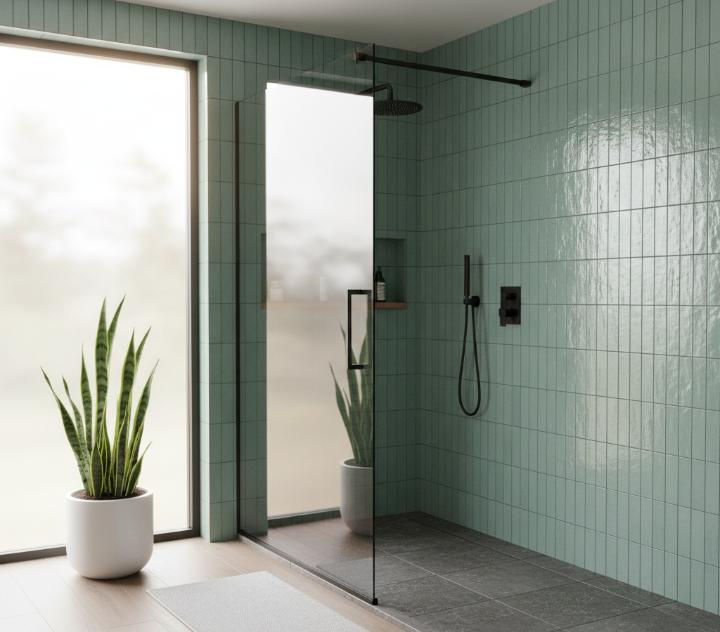
Professional Installation Timing
Choosing whether to employ a professional for your subway tile installation is a crucial choice that can determine your project's outcome. Let's review the advantages and the circumstances where it's the optimal decision.
Professional Knowledge and Skills
Professionals contribute years of practical knowledge, helping them to manage everything from exact tile cuts to complicated layouts easily. Their skills guarantee that tiles are correctly aligned, uniformly spaced, and firmly attached, something that can require a beginner hours of experimentation to accomplish.
For high-end tiles like the Mozart marble-look porcelain tiles in Eggshell, professional installers guarantee every aspect is perfect. The glossy surface and elegant design need careful alignment to keep their sophisticated appeal, and professionals are skilled at emphasizing these qualities without flaws. Whether it's creating smooth grout lines or maintaining consistent spacing, their focus on detail ensures a refined and luxurious result.
What could require a weekend (or more) for a DIYer can frequently be finished by a professional in one or two days. Their process knowledge and specialized equipment enable productive work, reducing interruption to your home. Additionally, professionals can handle obstacles like irregular walls or complex layouts, guaranteeing that even the most challenging installations are completed with accuracy.
Consistent Results and Confidence
Professionals provide outcomes that are both visually impressive and durable. From seamless grout lines to perfect transitions between tiles, their focus on detail guarantees a refined finish that improves your space. By reducing errors like crooked tiles or irregular grout, they eliminate the trouble and cost of fixes.
Many professionals also provide guarantees for their work, offering confidence that any problems will be handled without extra expenses. Whether you're improving a backsplash or planning a small bathroom update, employing a professional guarantees a worry-free experience and results that surpass expectations.
Advanced Installation Patterns
For complex designs like herringbone, accuracy and focus on detail are vital to reaching a perfect outcome. Installing Odyssey square porcelain tiles in Almond in a herringbone arrangement needs thorough planning, exact cuts, and uniform spacing to keep alignment. Since each tile must be placed at an angle, maintaining even grout lines and preventing lippage is important. Using a tile leveling system from a non-profit org and measuring carefully before placement can help reach a clean and professional appearance. Considering this pattern's complexity, professional installation can greatly lower errors and guarantee a perfect finish.
Also, walls that aren't completely flat or floors with dips and irregularities can make tile installation more difficult. Professionals understand how to level surfaces or use suitable adhesives to guarantee a secure and uniform finish, no matter the starting conditions.
Insufficient DIY Knowledge
If you're new to tiling or don't feel confident in your abilities, trying a subway tile installation can quickly become too much to handle. Professionals not only eliminate the trouble but also guarantee that your investment in premium tiles isn't damaged by inexperienced errors. Plus, if you're working with a tight schedule, such as getting a home ready for sale or completing a renovation before visitors come, employing a professional guarantees the work gets finished quickly and correctly the first time.
When perfection is important, whether it's a kitchen backsplash or a bathroom wall, professionals provide the refined results that DIY efforts often can't reach.
Budget Factors
When organizing a project, knowing the cost elements involved is crucial for effective budgeting. From material selections to labor costs, different factors can affect the total price, and it's essential to evaluate all elements before beginning.
Tile Dimensions, Materials, and Installation Approach
The dimensions of the subway tile affect the expense. Bigger subway tiles generally need fewer pieces to cover a surface, possibly lowering labor time. On the other hand, smaller tiles require more accuracy and cutting, which can raise both material waste and installation expenses.
The material choice is another major element affecting the expense. When exploring different types of tiles, ceramic options are typically more budget-friendly, making them a common selection for cost-aware projects. Porcelain tiles, though pricier, provide better durability and the capacity to copy the look of natural stone, offering a combination of practicality and luxury. Consider, for instance, the sophisticated Mozart hexagon tiles in Carrara Bianco. This marble-appearance porcelain tile displays elegance and refinement, providing the luxurious look of natural stone at a more affordable rate.
By contrast, natural marble or granite can greatly raise costs due to higher material expenses and the specialized attention needed during installation, making material selection a crucial factor in tile budget planning.
The installation approach you select can greatly affect the total expense. Thin-set adhesive, a commonly used approach, is both economical and efficient for most tile installations. However, alternative approaches like adhesive sheets might be more user-friendly but can increase material expenses. For complex patterns like herringbone, even with standard approaches such as thin-set adhesive, the extra time, exact implementation, and specialized tools needed can increase labor costs.
Labor Expenses and Surface Preparation
DIY installation can reduce labor expenses, but it needs both skill and time. If you don't have experience or are handling a complex design, employing a professional might be a better investment. Labor expenses can differ greatly based on location, the project's complexity, and the professional's knowledge.
Before placing tiles, surface preparation is essential. If the surface is irregular, needs cleaning, or requires patching, this will increase the project's expense. Professionals might need to level the surface or handle moisture problems, adding labor and materials to the final bill.
Project Complexity and Regional Pricing
Basic, straight-line installations cost less than complex designs. Patterns like herringbone or diagonal tiling need more planning, exact cuts, and a higher skill level, all of which result in additional expenses. For inspiration on contemporary layouts, resources like Style by Emily Henderson offer valuable design guidance. Installation expenses can differ based on your location. Metropolitan areas or regions with a higher cost of living generally have higher labor rates. Also, supply and demand in your region can influence tile pricing and contractor fees.
Caring for Your Subway Tile Installation
Consistent maintenance will keep your subway tiles appearing fresh and avoid damage over time, protecting your investment in quality materials. Always follow the manufacturer's instructions for cleaning and care to guarantee the best outcomes and lasting durability.
Daily Cleaning
To maintain subway tiles looking perfect, regular cleaning is vital. For general cleaning, use a gentle soap mixture and warm water. Stay away from harsh cleaners or scrubbing pads, as they can scratch the tile surface, particularly if they have a glossy finish. Instead, select a soft cloth or sponge, which will carefully remove dirt without harming the tile's surface.
It's also crucial to clean the tiles regularly to avoid soap residue and water marks from accumulating, especially in wet areas like kitchens and bathrooms. A quick cleaning after use can lower the need for intensive cleaning later.
For non-porous materials like ceramic and porcelain tiles, care is straightforward with a gentle, non-harsh cleaner and water.
Grout Maintenance
Grout is frequently the most susceptible part of a tile installation and needs special care. To avoid staining and color changes, it's crucial to seal the grout regularly, usually once yearly, or as suggested by the manufacturer. Sealing forms a protective layer that shields the grout from moisture and dirt, maintaining its fresh appearance.
When cleaning grout, use a grout brush and a suitable cleaner. Gentle, non-harsh solutions work best for most grout types, but for tough stains, you might need a specific grout cleaner. Stay away from acidic cleaners, as they can wear away the grout over time.
Handling Problems
Sometimes, problems like loose tiles, cracked grout, stains, or mold and mildew might occur. Loose tiles can be reattached with new adhesive, but if the tile is cracked or damaged, replacement is required. For cracked grout, it's crucial to remove the old grout and apply new grout to guarantee a smooth and secure surface.
Tile stains can be removed with gentle soap and water or a tile-safe cleaner, but for more stubborn stains, a specialty cleaner might be needed. Mold and mildew, common in humid conditions, can be handled with a mixture of vinegar and water. Make sure to clean areas affected by moisture regularly to avoid mold growth.
For specific flooring choices for your home in bathrooms or other high-moisture areas, proper maintenance becomes even more critical to prevent long-term damage.
Conclusion
Installing subway tiles doesn't have to be an overwhelming challenge when you approach it with the right knowledge and preparation. These timeless design elements offer incredible versatility and can transform any space with their classic appeal. Whether you choose the DIY route or opt for professional installation depends on your skill level, available time, and project complexity.
For straightforward installations with simple patterns like straight stack or basic brick lay, motivated DIY enthusiasts can achieve excellent results with proper planning, quality tools, and patience. However, complex patterns such as herringbone or installations on irregular surfaces are best left to professionals who bring the expertise needed to avoid costly mistakes.
Remember that successful subway tile installation extends beyond just laying the tiles, proper surface preparation, choosing the right materials, and understanding maintenance requirements all contribute to a lasting, beautiful result. By weighing the pros and cons of DIY versus professional installation and considering your specific project needs, you can make an informed decision that delivers the polished, sophisticated look that subway tiles are known for.
With companies like Nova Tile and Stone offering innovative tools like augmented reality previews and sample programs, planning your subway tile project has never been easier. When you shop their collection, you can explore options by shop by size, shop by type, or shop by style. For those seeking unique designs, consider their Mozart elongated hexagon tiles or Odyssey hexagon options. You can also browse by shop by color to find the perfect match for your space.
Take advantage of these resources to ensure your final installation reflects the precision, style, and enduring beauty that makes subway tiles a design favorite. Visit your local showroom for hands-on guidance, or explore finishing touches like Mozart bullnose tiles to complete your project professionally.
For those interested in exploring more design ideas and inspiration, resources like Houzz, The Inspired Room can provide valuable guidance for your kitchen renovation journey. Additionally, understanding ceramic tile standard ensures that your tile installation meets professional quality benchmarks.
Frequently Asked Questions
How long does it typically take to install subway tiles?
The installation time varies significantly based on your experience level and project scope. DIY enthusiasts should expect to spend a full weekend or longer for a standard backsplash, while professionals can typically complete the same project in 1-2 days. Complex patterns like herringbone or larger areas will require additional time. Factors such as surface preparation, drying time between steps, and the need for precise cuts can extend the timeline, especially for first-time installers.
What's the most beginner-friendly subway tile pattern for DIY installation?
The straight stack pattern is the most beginner-friendly option for DIY installation. This layout arranges tiles in neat, aligned rows and columns, eliminating the need for complex measurements or angled cuts. It offers a clean, modern look while being forgiving of minor imperfections. The traditional brick lay (running bond) pattern is also relatively manageable for beginners, though it requires more attention to offset alignment than the straight stack method.
Can I install subway tiles over existing tiles?
Installing subway tiles over existing tiles is possible in some situations, but it's not always recommended. The existing tiles must be firmly attached, clean, and provide a relatively flat surface. You'll also need to consider the added thickness, which may affect door clearances, outlets, and trim work. The surface should be thoroughly cleaned and lightly sanded for better adhesion. However, removing old tiles often provides better long-term results and is generally the preferred approach by professionals.
What's the biggest mistake DIYers make when installing subway tiles?
The most common DIY mistake is inadequate surface preparation. Many homeowners rush into tile laying without properly cleaning, leveling, or priming their surfaces, leading to poor adhesion and uneven installations. Other frequent errors include inconsistent spacing, failing to use a level consistently, mixing too much adhesive at once, and not planning the layout beforehand. These mistakes can result in crooked lines, uneven grout joints, and tiles that eventually come loose.
Do I need special tools for cutting subway tiles around outlets and corners?
Yes, you'll need specific tools for precise cuts around obstacles. A manual tile cutter works well for straight cuts, but a wet saw is essential for intricate shapes around outlets, switches, and corners. Tile nippers help with small adjustments and curved cuts, while a tile file smooths rough edges. For electrical outlets, you'll need to measure carefully and often make multiple relief cuts. Many hardware stores rent wet saws if you don't want to purchase one for a single project.