Refreshing old subway tiles with new grout or paint can completely transform your kitchen or bathroom without the expense and hassle of full tile replacement. This cost-effective renovation technique involves either regrouting with fresh, modern grout colors or applying specialized tile paint to change the tile color entirely, giving your space a brand-new look for a fraction of the cost. Whether you're dealing with dingy grout lines or outdated tile colors, this guide will walk you through everything you need to know about refreshing old subway tiles to achieve professional-looking results that can last for years.
Why Refresh Your Subway Tiles Instead of Replacing Them?
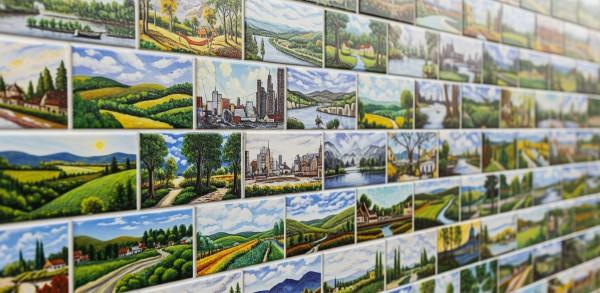
Before diving into the transformation process, let's explore why refreshing your existing subway tiles makes sense. Subway tiles have been a design staple for over a century, and their timeless appeal means they rarely go completely out of style. However, years of use can leave them looking tired and dated.
Cost Comparison: Refresh vs. Replace
Aspect | Refreshing Tiles | Full Replacement |
Average Cost | $200-$500 | $1,500-$3,500 |
Time Required | 1-2 days | 3-5 days |
Mess Level | Minimal | Extensive |
DIY Friendly | Yes | Challenging |
Longevity | 5-10 years | 15-20+ years |
Property Disruption | Low | High |
The financial savings alone make refreshing an attractive option for homeowners looking to update their space without breaking the budget. Plus, you can achieve dramatic results over a weekend without professional help.
Understanding Your Subway Tile Refresh Options
Option 1: Regrouting for a Fresh Look
Regrouting involves removing old, discolored grout and replacing it with new material. This method works best when your tiles are in good condition but the grout has become stained, cracked, or outdated. Modern grout comes in dozens of colors, allowing you to create contrast or complement your existing tiles perfectly.
The process requires careful preparation and the right tools, but the results can be stunning. Dark grout with white subway tiles creates a bold, contemporary look, while matching grout colors provide a seamless, classic appearance. For quality grout options and professional advice, consider visiting Nova Tile and Stone's shop to explore various grout colors and types.
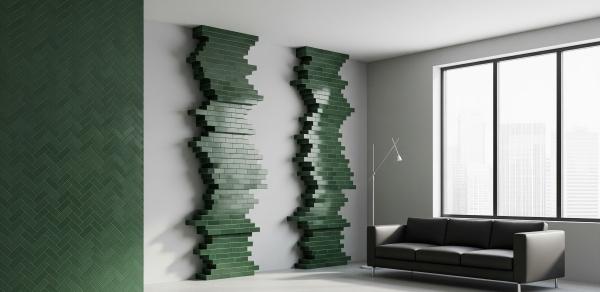
Option 2: Painting Subway Tiles
Tile painting offers the most dramatic transformation, allowing you to completely change the color of your tiles. Specialized epoxy or latex paints designed for tiles provide durable finishes that withstand moisture and daily use. This option works particularly well for dated colored tiles that clash with your current design aesthetic.
Essential Tools and Materials
For Regrouting Projects
Before starting your regrouting project, gather these essential tools and materials. Having everything ready ensures a smooth workflow and professional results.
Tools Needed:
- Grout removal tool (manual or oscillating)
- Grout float
- Large sponge
- Clean buckets
- Rubber gloves
- Safety glasses
- Dust mask
- Vacuum cleaner
- Clean cloths
Materials Required:
- New grout (sanded or unsanded)
- Grout sealer
- Grout cleaner
- Caulk for corners and edges
For Painting Projects
Painting tiles requires different supplies but follows a similar preparation principle. Quality materials make a significant difference in the final appearance and durability.
Tools Needed:
- Fine-grit sandpaper (220-grit)
- Paint rollers (foam works best)
- Small brushes for edges
- Painter's tape
- Drop cloths
- Tack cloth
Materials Required:
- Tile primer
- Tile paint (epoxy or latex-based)
- Paint sealer
- TSP cleaner or degreasing agent
Step-by-Step Guide to Regrouting Subway Tiles
Preparation Phase
Start by thoroughly cleaning your tiles with a degreasing cleaner. Remove all soap scum, mildew, and surface dirt. This initial cleaning reveals the true condition of your grout and helps you identify areas needing special attention. According to the Ceramic Tile Foundation, proper surface preparation accounts for 80% of a successful tile project.
Next, protect surrounding surfaces with painter's tape and plastic sheeting. Cover countertops, fixtures, and floors to prevent damage from grout removal debris. Remove any caulk from corners and edges where tiles meet other surfaces.
Removing Old Grout
The grout removal process requires patience and attention to detail. Using your grout removal tool, carefully scrape out the old grout to a depth of at least 1/8 inch. Work systematically across your tile surface, taking breaks to vacuum out debris regularly. This prevents loose grout from scratching your tiles.
For stubborn grout, consider using an oscillating multi-tool with a grout removal blade. These tools speed up the process significantly while reducing hand fatigue. Always wear safety glasses and a dust mask during this phase, as grout dust can be harmful when inhaled.
Applying New Grout
Mix your new grout according to manufacturer instructions, preparing only what you can use within 30 minutes. Using a grout float held at a 45-degree angle, spread grout diagonally across tiles, pressing firmly to fill all joints completely. Work in small sections of about 3 square feet at a time.
After grouting each section, wait 10-15 minutes, then use a damp sponge to remove excess grout from tile surfaces. Rinse your sponge frequently and use clean water to avoid spreading grout haze. The key is removing excess grout while it's still workable but firm enough not to pull out of joints.
Mini Step-by-Step: Perfect Grout Application
- Mix grout to peanut butter consistency using cool water and manufacturer ratios
- Apply diagonally across tiles using firm pressure to pack joints fully
- Clean excess with a barely damp sponge in circular motions
- Shape joints with a grout shaping tool or rounded stick for uniform appearance
- Apply sealer after 24-48 hours of curing for long-lasting protection

The Complete Tile Painting Process
Surface Preparation for Painting
Painting tiles successfully starts with meticulous preparation. Clean tiles thoroughly with TSP or a strong degreasing agent, then rinse completely and allow to dry. Lightly sand the tile surface with 220-grit sandpaper to create texture for paint adhesion. This step is crucial for glossy tiles that would otherwise repel paint.
After sanding, vacuum all dust and wipe tiles with a tack cloth. Apply painter's tape to protect adjacent surfaces, fixtures, and any areas you don't want painted. For detailed painting techniques and professional tips.
Priming and Painting Techniques
Apply a high-quality bonding primer designed for tiles, using a foam roller for smooth application. Allow the primer to dry completely according to manufacturer specifications, usually 4-6 hours. This primer layer ensures your paint adheres properly and provides lasting results.
When applying tile paint, use thin, even coats rather than trying to achieve full coverage in one pass. Most tiles require two to three coats for optimal coverage and durability. Roll paint in different directions to avoid streaking, and use a small brush for grout lines if you want them painted too.
Pros and Cons of Tile Painting
Pros:
- Complete color transformation possible
- Covers damaged or stained tiles effectively
- Less messy than regrouting
- Can paint both tiles and grout simultaneously
- Ideal for rental properties or temporary updates
- Wide variety of color options available
Cons:
- Requires careful surface preparation
- Paint may chip with heavy use
- Not suitable for floor tiles in high-traffic areas
- Needs periodic touch-ups
- Professional-grade materials can be expensive
- Painted surface texture differs from original tiles
Choosing the Right Method for Your Space
Bathroom Considerations
Bathrooms present unique challenges due to high moisture levels and frequent temperature changes. For shower areas, regrouting typically provides better long-term results than painting, as constant water exposure can compromise painted surfaces. However, bathroom walls away from direct water contact respond well to either method.
Consider using epoxy grout for bathroom applications, as it resists mold, mildew, and staining better than traditional cement-based grouts. When exploring options for bathroom renovations, Nova Tile and Stone's style collection can inspire complementary design choices that work with your refreshed tiles.
Kitchen Backsplash Updates
Kitchen backsplashes offer ideal conditions for both regrouting and painting projects. These areas typically experience less moisture than bathrooms but still require durable finishes to withstand cooking splashes and regular cleaning.Installing a subway tile backsplash or refreshing an existing one can dramatically update your kitchen's appearance.
For kitchens, consider how your refresh method will coordinate with countertops and cabinetry. Dark grout can hide stains better in cooking areas, while painted tiles allow you to match or complement existing color schemes perfectly.
Maintenance and Longevity Tips
Caring for Regrouted Tiles
Newly grouted tiles require proper maintenance to maintain their fresh appearance. Seal grout lines annually to prevent staining and moisture penetration. Clean grout regularly with pH-neutral cleaners to avoid breaking down the sealer prematurely. For routine maintenance, a mixture of warm water and mild dish soap works effectively without damaging grout or sealer.
Avoid harsh chemicals like bleach or ammonia-based cleaners on sealed grout, as these can deteriorate both the grout and sealer over time. Instead, use specialized grout cleaners when dealing with stubborn stains. Porcelain tile cleaning tips often apply to maintaining regrouted surfaces as well.
Maintaining Painted Tiles
Painted tiles require gentler care than original ceramic surfaces. Use non-abrasive cleaners and soft cloths or sponges to avoid scratching the paint finish. Avoid scrubbing vigorously, especially during the first month while paint fully cures. Touch up any chips or scratches promptly to prevent water from getting under the paint layer.
Consider applying a clear protective sealer over painted tiles in high-use areas for added durability. This extra layer helps resist scratches and makes cleaning easier while maintaining the paint's appearance longer.
Advanced Techniques and Design Ideas
Creating Pattern Effects with Grout
Strategic grout color choices can create stunning visual effects without changing tiles themselves. Consider these creative approaches:
Gradient Effect: Use progressively darker grout colors from top to bottom for an ombre appearance that adds depth to your wall. This technique works particularly well in shower surrounds or feature walls.
Checkerboard Pattern: Alternate between two grout colors in a checkerboard pattern for visual interest. This requires careful planning and taping but creates a unique, custom look.
Accent Rows: Use contrasting grout color for specific rows to create horizontal stripes that can make spaces appear wider. This works especially well with classic white subway tiles.
Combining Techniques for Maximum Impact
For the ultimate transformation, consider combining both regrouting and selective tile painting. Paint accent tiles in a complementary color while regrouting the rest for a custom designer look. This approach allows you to add personality without committing to painting all tiles.
You might also consider adding decorative tile elements as accents within your refreshed subway tile installation. These special pieces can serve as focal points that enhance your overall design
Budget Planning and Cost Breakdown
Realistic Budget Expectations
Understanding the true costs helps you plan effectively and avoid surprises. Here's a detailed breakdown for a typical 50-square-foot backsplash project:
Regrouting Costs:
- Grout removal tool: $15-$50
- New grout: $15-$30
- Grout float: $10-$15
- Sealer: $20-$30
- Miscellaneous supplies: $20-$30
- Total DIY Cost: $80-$155
Tile Painting Costs:
- Primer: $25-$35
- Tile paint: $30-$50
- Rollers and brushes: $15-$25
- Sandpaper and supplies: $10-$15
- Protective sealer: $20-$30
- Total DIY Cost: $100-$155
Professional installation typically costs 3-4 times these amounts but ensures expert results. For extensive projects or valuable properties, professional installation might be worth the investment.
Common Mistakes to Avoid
Regrouting Pitfalls
Many DIYers make preventable mistakes that compromise their results. Avoid mixing too much grout at once, as it begins setting within 30 minutes. This rushed application leads to inconsistent joint filling and poor adhesion. Similarly, using too much water when cleaning excess grout can pull grout from joints, creating gaps and weak spots.
Don't skip the sealing step, even if grout manufacturers claim their products are stain-resistant. Unsealed grout absorbs moisture and stains, leading to premature deterioration. For expert guidance on avoiding common tiling mistakes, This Old House's bathroom tile guide provides valuable professional insights.
Painting Errors
The biggest painting mistake is inadequate surface preparation. Painting over dirty, glossy, or damaged tiles results in poor adhesion and premature peeling. Take time to properly clean, sand, and prime surfaces for lasting results.
Applying paint too thickly causes drips, uneven texture, and extended drying times. Multiple thin coats provide better coverage and durability than one thick application. Also, removing painter's tape while paint is still wet prevents peeling and ensures clean line
When to Call Professionals
While both regrouting and painting are DIY-friendly projects, certain situations warrant professional help. Large areas, structurally damaged tiles, or tiles requiring removal need expert attention. Professionals have specialized tools and experience to handle complex situations efficiently.
If you discover mold behind tiles or extensive water damage during your project, stop immediately and consult professionals. These issues require proper remediation to prevent health hazards and structural damage. Nova Tile and Stone's experts can assess your situation and recommend appropriate solutions.
Exploring Alternative Options
Tile Stickers and Decals
For renters or those seeking temporary updates, tile stickers offer a damage-free alternative. These vinyl decals adhere to existing tiles without permanent alterations. While not as durable as paint or grout, they provide instant transformation with minimal effort and investment.
Quality tile stickers resist moisture and heat reasonably well, making them suitable for backsplashes and bathroom walls outside shower areas. They're particularly effective for adding patterns or designs to plain subway tiles.
Tile Refinishing Services
Professional tile refinishing services use specialized equipment and industrial-grade coatings to resurface tiles. This option costs more than DIY methods but less than full replacement, typically lasting 10-15 years with proper care. The process involves chemically etching tiles before applying multiple coating layers for a factory-like finish.
Consider professional refinishing for valuable vintage tiles or when dealing with unusual tile materials that require specialized knowledge. Understanding different tile types helps determine whether refinishing suits your specific tiles.
Final Considerations for Your Project
Timeline Planning
Realistic timeline planning ensures project success without rushing critical steps. Regrouting typically requires:
- Day 1: Preparation and old grout removal (4-6 hours)
- Day 2: New grout application and initial cleaning (3-4 hours)
- Day 3: Final cleaning and sealing (2-3 hours)
Painting projects follow a similar timeline but require additional drying time between coats. Plan for unexpected delays and avoid scheduling projects before important events.
Seasonal Considerations
Temperature and humidity significantly affect both grout and paint curing. Ideal conditions include temperatures between 50-80°F with moderate humidity. Avoid projects during extreme weather or when you cannot maintain consistent indoor conditions.
Summer provides optimal conditions for most areas, with good ventilation speeding drying times. Winter projects might require additional heating and dehumidification for proper curing. Understanding various tile installation factors helps you plan according to your specific situation.
Conclusion
Refreshing old subway tiles with new grout or paint offers an affordable, impactful way to transform your kitchen or bathroom without the expense and disruption of full tile replacement. Whether you choose to regrout for a subtle update or paint for dramatic change, following proper techniques ensures professional-looking results that enhance your home's value and appeal.
The key to success lies in thorough preparation, quality materials, and patience throughout the process. Take time to evaluate your tiles' condition, choose the right method for your space, and gather all necessary supplies before starting. With careful execution, your refreshed subway tiles can look stunning for years to come.
Ready to start your tile transformation project? VisitNova Tile and Stone for expert advice, quality materials, and inspiration for your next home improvement project. Our knowledgeable team can help you select the perfect products to achieve professional results. Explore our extensive collection oftiles by color, size, and type to complement your refreshed subway tiles perfectly.
Don't let outdated tiles diminish your home's beauty any longer. Whether you're planning a simple grout refresh or a complete color transformation,Nova Tile and Stone's local showroom offers everything you need to bring your vision to life. Learn more about our company and discover why homeowners trust us for all their tile needs. Browse our comprehensive product selection today and take the first step toward your stunning tile transformation.
Would you like more information
about a product?
Frequently Asked Questions
How long does regrouting subway tiles typically take?
Regrouting a standard bathroom or kitchen backsplash typically takes 2-3 days from start to finish. This includes removing old grout (4-6 hours), applying new grout (3-4 hours), and allowing proper curing time (24-48 hours) before sealing. Larger areas or tiles with intricate patterns may require additional time.
Can I paint over existing grout when painting tiles?
Yes, you can paint over existing grout when painting tiles, and many homeowners choose this option for a cohesive look. Use the same primer and paint on both surfaces, applying thin coats with a small brush on grout lines. However, painted grout may wear faster than painted tiles and might need more frequent touch-ups.
What type of paint works best for subway tiles in shower areas?
For shower areas, use 100% epoxy paint specifically formulated for high-moisture environments. These paints cure to a hard, waterproof finish that resists mold and mildew. Avoid latex-based paints in direct water contact areas, as they may peel or bubble over time despite being marketed as bathroom-safe.
How often should I reseal grout after regrouting?
Reseal grout annually for optimal protection, especially in high-moisture areas like showers and behind kitchen sinks. Some premium sealers claim to last 2-3 years, but annual application ensures consistent protection against stains and moisture infiltration. Mark your calendar to maintain this important maintenance schedule.
Is it worth refreshing old subway tiles instead of replacing them?
Refreshing old subway tiles is definitely worth it when tiles remain structurally sound but look dated or dingy. You'll save 70-80% compared to replacement costs while achieving dramatic visual improvements. This approach makes particular sense for classic subway tiles, which never truly go out of style and respond well to updates.