Installing a subway tile backsplash typically takes one weekend for beginners and costs significantly less than professional installation. This DIY project requires basic tools, careful planning, and attention to proper techniques. With the right preparation, first-time tilers can successfully complete a kitchen backsplash installation in approximately 12-16 hours spread across two days: day one for tile installation and day two for grouting after overnight drying.
Key requirements for success include: a wet saw for precise cuts around outlets, mosaic tile sheets for easier installation, appropriate moisture barriers for areas near sinks, and proper spacers to maintain consistent grout lines. The most common mistakes beginners make involve selecting high-contrast grout that highlights imperfections, attempting complex cuts without adequate tools, and improper cleanup procedures that damage kitchen fixtures.
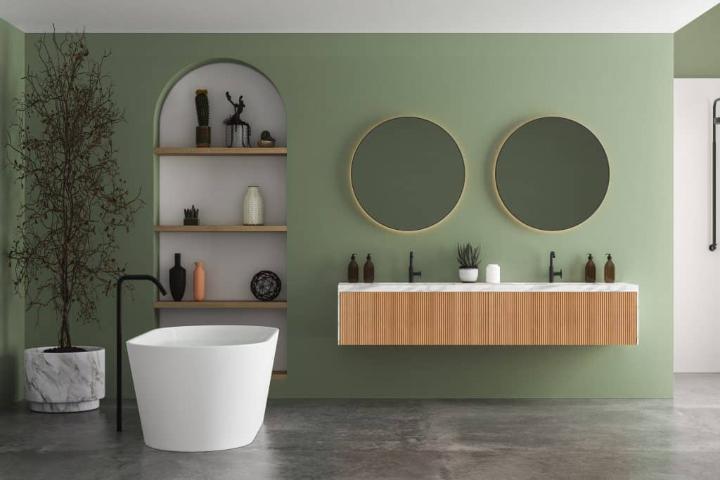
When professional installation quotes exceeded our renovation budget, we committed to learning proper tile installation techniques and completed our farmhouse-style backsplash ourselves. This guide shares essential dos and don'ts to help you achieve professional-quality results while avoiding common pitfalls that compromise both appearance and durability.
The Essential "Dos" for Subway Tile Success
Do Complete Thorough Prep Work Before Starting
Jumping into a tile backsplash project without adequate preparation sets you up for frustration and mistakes. Invest time upfront researching installation techniques through video tutorials and following professional tile layout tips and best practices. Study how different tools function and understand the sequence of steps from wall preparation through final grouting.
Nova Tile and Stone offers complimentary design consultations to help you plan your backsplash layout, select appropriate tile sizes, and determine the best materials for your specific application. Knowledgeable design professionals can provide insights that prevent costly errors.
Make notes about recommended products, tool specifications, and common pitfalls to avoid. This preparation phase dramatically reduces stress when you're actually working with tile and adhesive.
Do Evaluate Your Wall Surface Carefully
The foundation for your tile installation determines its long-term durability and appearance. Standard drywall works adequately in low-moisture areas, but backsplashes near sinks or in humid environments require enhanced moisture protection.
Install cement-based backer board in areas exposed to regular water contact. This water-resistant substrate prevents moisture infiltration that causes mold growth and tile failure.
Check your existing wall condition before purchasing materials. Damaged drywall needs repair or replacement before tiling begins. Use a level to identify any significant irregularities that could affect tile alignment.
Do Select Mosaic Tile Sheets for Easier Installation
Individual subway tiles offer maximum design flexibility, but mosaic sheets mounted on mesh backing significantly simplify installation for beginners. These pre-assembled sheets maintain consistent spacing between tiles automatically, eliminating the tedious process of placing individual spacers.
The mesh backing allows you to cut sheets into custom configurations using a standard box cutter. Smaller tile dimensions within mosaic sheets make fitting around outlets and cabinet edges substantially easier than working with larger individual pieces.
You'll achieve more consistent results with less frustration, especially when navigating obstacles like electrical boxes or uneven cabinet runs. Schedule a design consultation to explore classic 3x6 subway tiles and discuss layout options for your specific space.
Do Secure Access to a Quality Wet Saw
Many beginners assume basic tile cutters handle all necessary cuts during backsplash installation. This leads to problems when you encounter outlets, cabinet edges, or other obstacles requiring U-shaped notches or precise corner cuts.
A wet saw equipped with a diamond blade cuts cleanly through ceramic and porcelain tile without chipping or cracking. Manual tile cutters and nippers work adequately for simple straight cuts, but tiles larger than one inch in diameter demand the precision of a wet saw for complex shapes.
If purchasing seems excessive for a single project, explore rental options at home improvement stores. The modest rental cost proves worthwhile when making intricate cuts around electrical components.
Do Upgrade Electrical Covers and Fixtures
The final details of your backsplash installation create lasting impressions of quality. After grouting and cleaning your tile, replace dated or damaged outlet covers with fresh versions that complement your new backsplash.
Standard plastic covers cost just a few dollars and make a noticeable difference in the finished appearance. Consider upgrading receptacles themselves per National Kitchen & Bath Association guidelines. Tamper-resistant outlets provide safety for households with children, while USB-equipped outlets add modern convenience.
New electrical components help conceal any minor imperfections in tile cuts around outlet boxes.
Critical "Don'ts" to Avoid Common Mistakes
Don't Select High-Contrast Grout Colors as a Beginner
Bold grout colors create dramatic visual impact when installed with precision. However, high-contrast grout, such as dark gray or black against white subway tile, ruthlessly highlights every imperfection in your tile layout and grouting technique.
As first-time tilers, our uneven lines and spacing inconsistencies became glaringly obvious with near-black grout against white tile. Light gray or off-white grout masks minor installation flaws while still defining individual tiles.
Save high-contrast grout combinations for after you've developed tile installation skills. Your first backsplash will likely contain small imperfections. Select grout colors that minimize their visibility. Visit our contact page to connect with design experts who can help you choose grout colors that complement your tile selection while accounting for your skill level.
Don't Rely Solely on Grout for Gap Filling
Beginners often assume grout solves all spacing and alignment issues during tile installation. This misconception leads to structural problems and aesthetic disappointments.
Grout serves as joint filler between tiles, not as a solution for poor planning or measurement errors. Large gaps caused by improper layout require tile repositioning, not excessive grout application.
Thick grout lines create weak points that crack under stress and collect moisture that damages underlying surfaces. Plan your tile layout carefully before applying any adhesive.
Use proper spacers to maintain consistent joint widths suitable for your grout type. If gaps appear too wide during installation, remove tiles and adjust positioning rather than fixing problems with extra grout.
Don't Apply Caulk Without Proper Taping
The junction between your tile backsplash and countertops requires caulk rather than grout for proper waterproofing and flexibility. However, freehand caulking typically produces wavy, unprofessional-looking lines that detract from your tile work.
Professional results demand painter's tape to create clean, straight caulk lines. Apply tape along both sides of the joint before applying caulk.
Smooth the caulk into place using a wet finger or caulking tool, then immediately remove the tape before the caulk skins over. This technique, recommended by tile edge protection experts, guarantees straight, consistent lines even without extensive caulking experience.
Don't Clean Tools or Materials in Your Kitchen Sink
The convenience of an adjacent sink tempts many DIYers to rinse tools and supplies during tile installation. Resist this urge completely.
Grout and thinset contain abrasive particles that permanently scratch porcelain and enamel sink finishes. Even small amounts of tile adhesive or grout damage sink surfaces and create stubborn stains.
Additionally, these materials harden in drain pipes, causing clogs that require professional plumbing repairs. We discovered fine scratches across our sink's enamel surface after carelessly washing equipment.
Establish a cleanup station outdoors or in a utility sink. Cover countertops, sinks, and appliances with painter's tarps or contractor's paper before beginning installation.
Choosing the Right Subway Tile for Your Project
The type and quality of tile you select significantly impacts both installation difficulty and long-term satisfaction. Understanding the differences between porcelain and non-porcelain ceramic tile helps you make informed decisions that match your budget and skill level.
Shop tiles by type to compare glazed ceramic, porcelain, glass, and natural stone options. Each material offers distinct advantages in terms of durability, water resistance, and visual appeal.
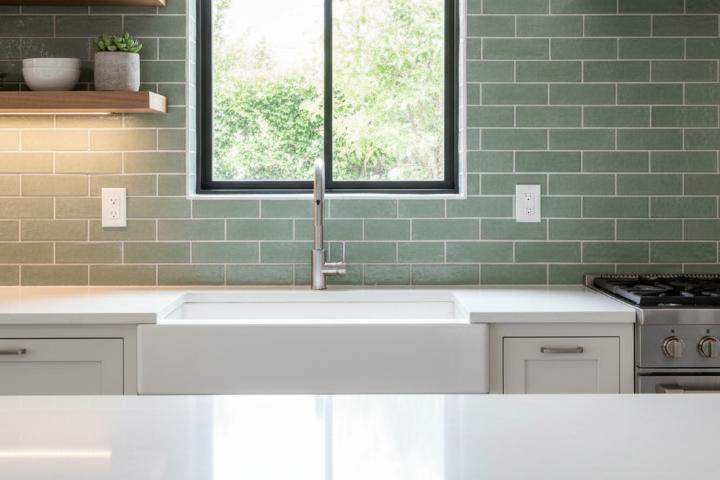
Consider exploring subway tile color selections beyond traditional white to create a backsplash that complements your kitchen's overall design scheme. Whether you prefer classic white, sophisticated gray, or bold accent colors, shop tiles by color to find the perfect shade that matches your vision. Modern subway tiles come in countless colors, finishes, and textures that maintain the classic aesthetic while adding personal style.
For those seeking specific dimensions, browse tiles by size to ensure you select proportions that work with your space and skill level. Larger format tiles like the 3x12 matte porcelain subway tile create a modern look with fewer grout lines, while traditional dimensions offer timeless appeal.
Quality tiles meeting ANSI A137.1 ceramic tile standards ensure consistent sizing, durability ratings, and performance characteristics. Investing in certified tiles from reputable manufacturers reduces installation challenges caused by warping, size inconsistencies, or quality defects.
Natural stone subway tiles require additional considerations for sealing and maintenance. The Natural Stone Institute provides valuable resources about caring for marble, travertine, and limestone subway tiles that bring organic beauty to kitchen designs.
Staying Current with Design Trends
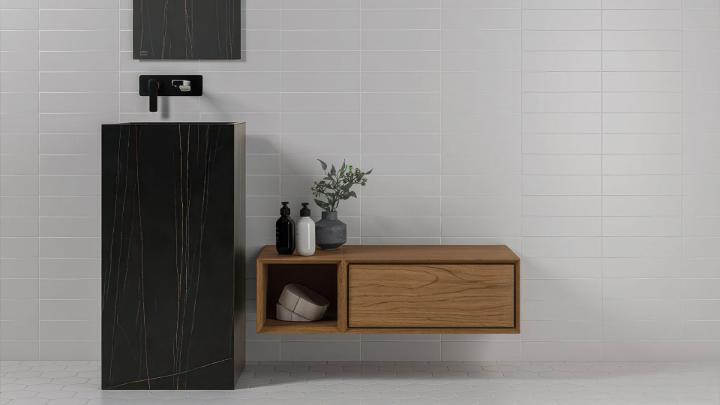
While subway tile remains a timeless choice, contemporary applications continue evolving with new patterns, finishes, and installation techniques. Staying informed about current bathroom tile trends helps you create a backsplash that feels both classic and current.
Industry events like Coverings, North America's largest tile and stone exhibition, showcase innovative products and installation methods that inspire creative applications of traditional subway tile formats. Visit a local Nova Tile and Stone showroom to see the latest arrivals and get hands-on experience with different textures and finishes.
Consider textured or three-dimensional subway tiles like the Linear 5x10 glossy 3D decorative subway tile that adds depth and visual interest to standard backsplash installations. These specialty tiles can serve as accent strips within larger fields of traditional flat tiles.
For those willing to explore beyond conventional subway patterns, terrazzo-look tile options and other contemporary styles offer alternatives that maintain similar installation techniques while providing distinctive aesthetics. Discover various tile styles to find the perfect match for your kitchen's design direction.
Reviewing the products we carry helps you understand the full range of possibilities available for your backsplash project, from budget-friendly options to premium designer tiles that create statement-making installations.
Conclusion
Successfully installing a subway tile backsplash requires careful planning, proper tools, and realistic expectations about the learning curve involved. The dos we've outlined create the foundation for professional-looking results, while the don'ts help you avoid common mistakes that compromise appearance and durability.
Our weekend project transformed our kitchen while teaching valuable skills applicable to future renovations. Your first tile backsplash won't achieve absolute perfection, and that's acceptable. Minor imperfections fade from notice once you appreciate the overall transformation.
Before starting your project, consider taking advantage of free design consultations where experts can help you visualize your finished backsplash, calculate material quantities, and explore our complete tile selection. Learn more about us and our locations in Reno, Minden, Sacramento, and Fernley, where working with Certified Ceramic Tile Specialists ensures you receive accurate guidance for your specific installation challenges.
Approach your project methodically and don't hesitate to research solutions when unexpected challenges arise. With the right preparation and realistic expectations, you'll achieve a beautiful subway tile backsplash that adds lasting value to your kitchen.
Frequently Asked Questions
How long does it take to install a subway tile backsplash as a beginner?
Plan for a full weekend to complete a standard kitchen backsplash installation. The first day covers wall preparation, tile layout planning, and tile installation with adhesive. Allow overnight drying time before grouting on the second day. Complex layouts with multiple outlets may require additional time. Proper drying time between phases ensures strong adhesion and prevents tile shifting during grouting.
Can I install subway tile over existing tile backsplash?
Installing new tile over existing tile is possible if the original installation remains firmly attached and creates a flat surface. However, this adds thickness that may interfere with electrical outlets, cabinet fit, and countertop alignment. Removing old tile provides better foundation and ensures proper adhesion. If the existing tile shows looseness, cracking, or water damage, removal becomes mandatory.
What size spacers should I use for subway tile backsplash?
Most subway tile backsplashes use 1/16-inch or 1/8-inch spacers depending on tile size and desired aesthetic. Smaller spacers create tight grout lines suitable for precise installations. Larger spacers provide more forgiving grout lines that accommodate slight size variations. Mosaic sheets typically include built-in spacing. Match your spacer size to your grout type. Sanded grout requires joints of at least 1/8-inch.
How much extra tile should I purchase for a backsplash project?
Order 10-15% more tile than your calculated square footage to account for cuts, breakage, and future repairs. Complex layouts with diagonal patterns or extensive cuts require the higher end of this range. Tile from different production lots may vary slightly in color or size, making future matching difficult. Keep several extra tiles after completion for potential repairs.
Do I need to seal my subway tile backsplash after installation?
Glazed ceramic and porcelain subway tiles don't require sealing because their glass-like surface naturally resists water and stains. However, grout lines need sealing to prevent moisture penetration, staining, and mold growth. Apply grout sealer after the grout fully cures, typically 48-72 hours after installation. Natural stone subway tiles require both tile and grout sealing. Reapply grout sealer annually in high-use areas.