Emerging from necessity and refined through style, subway tiles have evolved significantly since their debut in New York City's 1904 transit system. Initially selected for their shiny surface, cleaning simplicity, and organized arrangement, these 3"x6" tiles became the template for what would transform into an enduring design classic.
Currently, subway tiles transcend their functional roots, they serve as a canvas for artistic innovation. From extended dimensions and surface textures to sharp-edged profiles and installation flexibility, they deliver a compelling balance of function and aesthetics. This resource examines what positions subway tiles as a design must-have and demonstrates their confident application across diverse environments.
The Lasting Influence and Background of Subway Tiles
To fully grasp the persistent allure of subway tiles, understanding their inception and transformation proves valuable. From their utilitarian beginnings to their contemporary adaptability, these tiles have legitimately secured their status as a design cornerstone.
How Subway Tiles Originated
The narrative starts in 1904, when subway tiles made their initial appearance within New York City's transit infrastructure. Designers George C. Heins and Christopher Grant La Farge chose 3"x6" white glazed ceramic tiles installed in an offset brick arrangement to establish a hygienic, luminous, and simple-to-maintain setting.
This selection stemmed from functional considerations: the tiles' compact, non-porous structure, achieved through firing natural clay at elevated temperatures, and their glossy coating, which repelled moisture, staining, and bacterial growth.
Their utility rapidly spread to home interiors, particularly in cooking and bathing areas, and they quickly became a signature feature in early 20th-century design styles like Arts and Crafts and Art Deco.
What Makes Subway Tiles a Continuing Design Staple
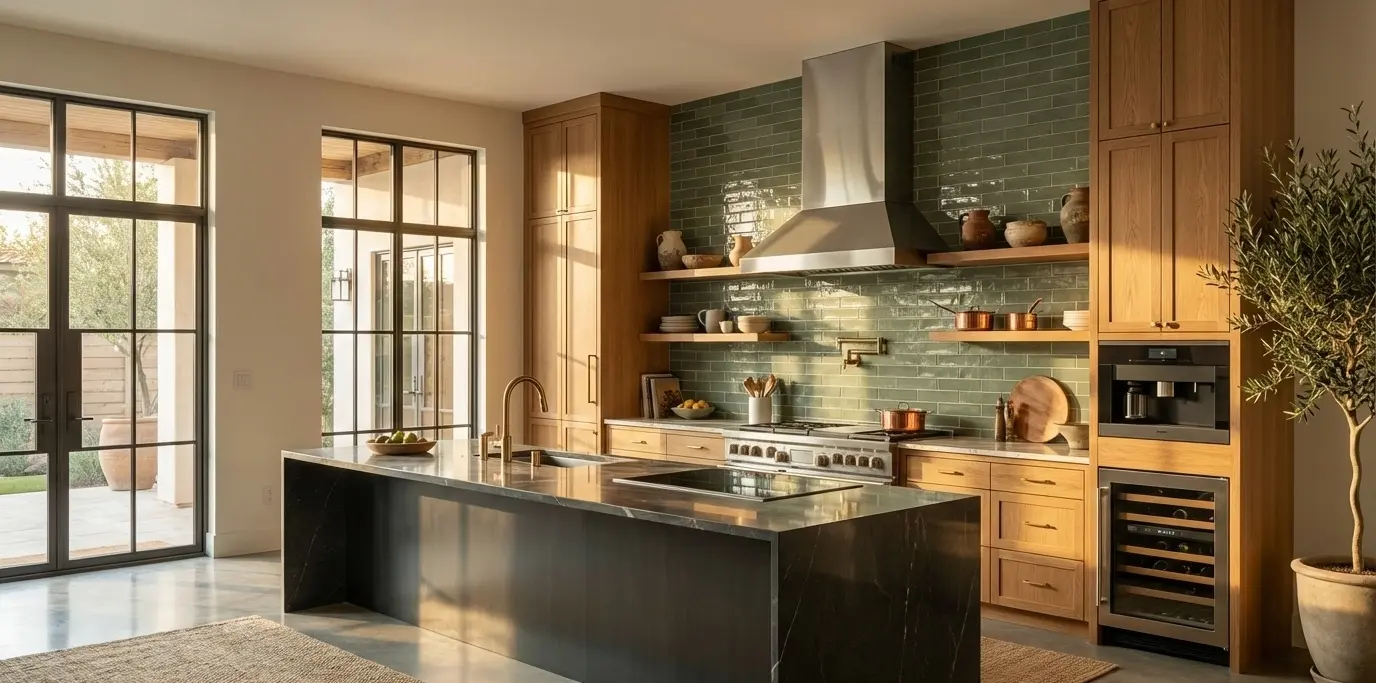
More than a hundred years later, subway tiles remain valued for their blend of resilience, maintenance convenience, and classic appeal. Their uniform dimensions enable accurate installation and pattern diversity, with arrangements like herringbone, vertical stack, and basketweave delivering modern interpretations of a traditional format.
Beyond conventional glazed ceramic, contemporary subway tiles come in porcelain subway tiles for superior strength and moisture protection, plus glass and natural stone for enriched dimension and surface variation.
Their simple-care finishes and harmony with multiple design approaches, from farmhouse to modern, guarantee their ongoing prominence in both home and business settings.
Exploring the Multiple Advantages of Selecting Subway Tiles
Apart from their classic appearance, subway tiles provide practical benefits that position them as an intelligent selection for virtually any environment. From sustained performance to daily convenience, their continued prominence in both style and utility becomes clear.
Strength and Extended Lifespan
A primary attribute of subway tiles involves their enduring strength, attributed to their high-temperature ceramic or porcelain manufacturing. Porcelain, featuring its extremely low absorption capacity (under 0.5%), performs exceptionally in moisture-heavy spaces by preventing water penetration, heat-related stress, and staining.
Complementing their solid composition, the glazed coating provides an additional protective barrier, guarding against surface damage and color fading while preserving visual sharpness.
With correct installation, subway tiles function remarkably well in bathrooms, kitchens, and other challenging locations, establishing them as a resilient, minimal-upkeep option that endures over time.
Design Adaptability
Yet strength alone doesn't explain subway tiles' continued success, design versatility plays an equally significant role. Their modular proportions, spanning from the traditional 3"x6" to stretched or beveled alternatives, accommodate numerous patterns including running bond, herringbone, and vertical stack, each presenting distinct design character.
Beyond standard uses, these tiles work equally well outside backsplashes and bathrooms. Premium porcelain versions prove sturdy enough for floor installations, while their aesthetic flexibility renders them appropriate for fireplace frames, shower recesses, and feature walls.
For inspiration on incorporating tiles throughout your home, explore bathroom remodel inspiration that showcases creative applications.
Cleaning Simplicity and Upkeep
Subway tiles aren't just visually adaptable, they're also remarkably simple to maintain. Featuring smooth, sealed surfaces, glazed subway tiles require minimal care. A quick wipe using a gentle cleaning solution keeps them spotless, and their opposition to mold and mildew renders them particularly functional in cooking and bathing spaces.
For further maintenance reduction, rectified edges enable narrower grout spacing, while contemporary grouts, including epoxy and urethane-based formulas, deliver stain opposition and antimicrobial advantages.
Combined, these characteristics promote lasting cleanliness with limited effort.
Budget-Friendly Value
Subway tiles represent one of the most attainable and economical tiling choices. Their uniform dimensions and widespread manufacturing maintain material expenses low, while their uncomplicated installation reduces labor costs—perfect for both contractors and DIY homeowners.
According to ceramic tile market research, the accessibility and affordability of subway tiles continue to drive their popularity in renovation projects.
Remarkably, even high-end materials like marble or glass gain affordability when manufactured in compact subway formats. Paired with their design influence and installation ease, subway tiles provide strong value for projects across all budgets.
Professional Guidance for Selecting Ideal Subway Tiles
After weighing the overall advantages, it's appropriate to examine the particulars. Selecting the ideal subway tile involves technical considerations alongside personal preference. From composition and shade to grout and edge style, every decision directly influences the look, mood, and performance of your completed project.
Evaluating Material Choices
The initial decision involves selecting between ceramic and porcelain, two materials with unique properties.
Begin with ceramic subway tiles, the conventional option for subway tile projects. These originate from red or white clay and feature a glazed coating that introduces color and luster.
They're simpler to cut and typically more budget-conscious, rendering them suitable for walls in kitchens, bathrooms, and other light-duty spaces.
Conversely, porcelain tiles derive from denser clay and undergo firing at elevated temperatures. These tiles deliver enhanced durability and moisture resistance, proving ideal for steam showers, bathroom flooring, or exterior applications.
Their minimal absorption capacity (under 0.5%) renders them more robust, though they demand specialized cutting tools because of their hardness.
Choosing Appropriate Size, Shade, and Surface Treatment
Subway tiles exist in multiple sizes and ratios that affect both installation possibilities and visual effect. While the 3"x6" traditional format stays popular, extended tiles create a smoother, more current aesthetic.
Smaller formats, alternatively, introduce texture in limited spaces, and larger versions minimize grout lines, optically enlarging a space. Browse options when you shop tiles by size to find the perfect dimensions for your project.
Following size determination, shade becomes a critical element. It should complement your space's illumination and color scheme. Traditional white remains a preferred choice as it illuminates and expands, while dark or subdued shades introduce contrast and dimension.
To explore various hues, tiles by color and visualize how different tones transform your space.
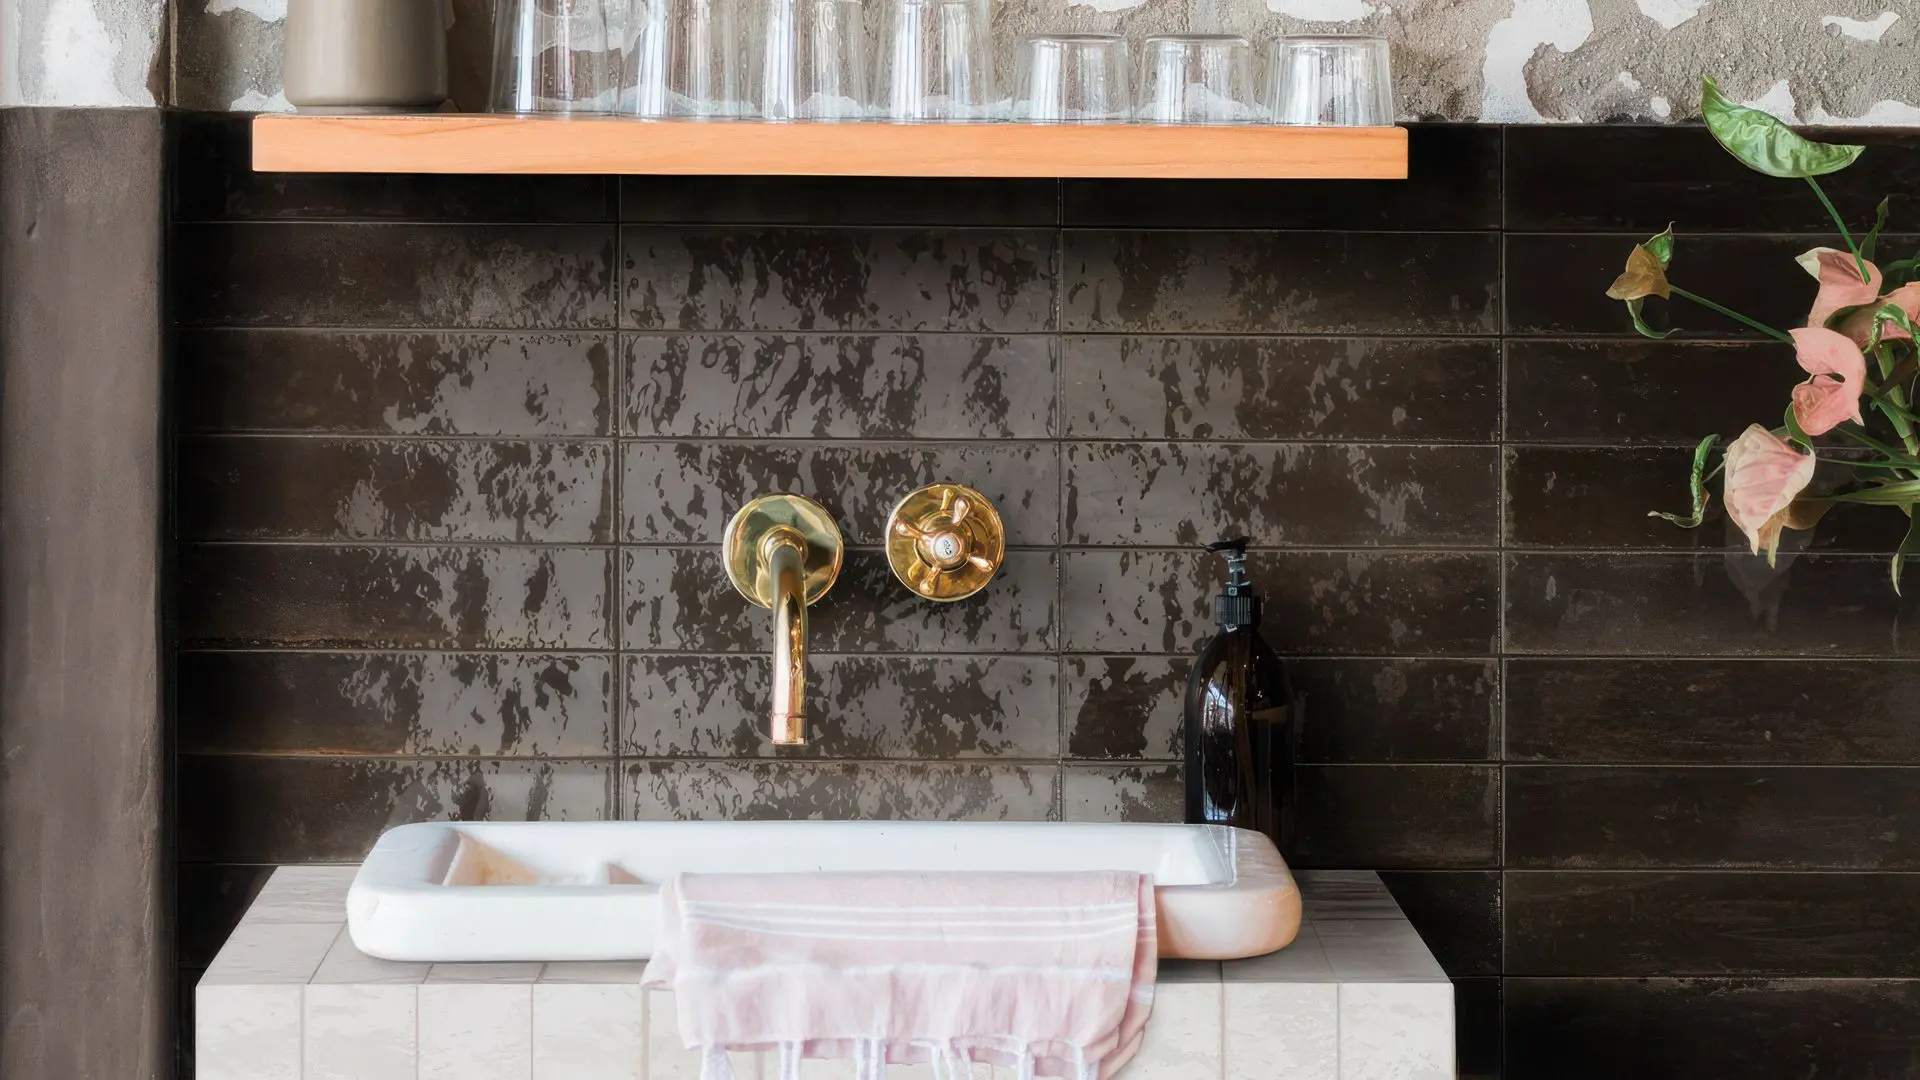
Similarly crucial is the surface treatment, which substantially affects both appearance and tile functionality. For example, glossy finishes reflect illumination and simplify cleaning, excellent for backsplashes and bathrooms while matte tiles present a gentler, more current appearance and conceal fingerprints better in frequently-touched zones.
The Perfection 2.5x8 matte porcelain subway tile exemplifies this contemporary aesthetic with its sophisticated look.
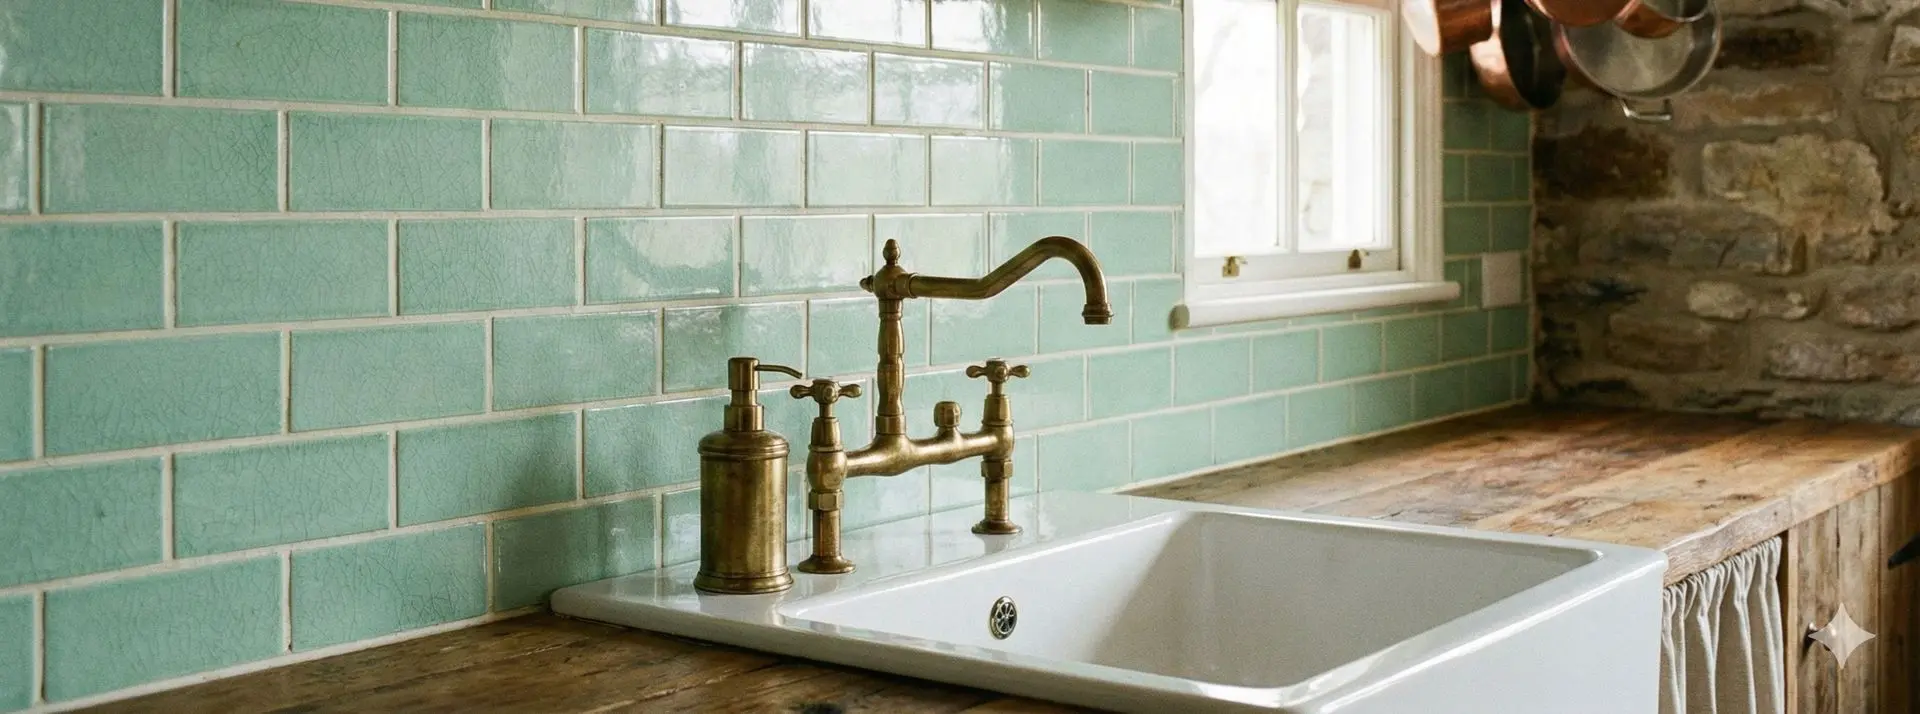
Meanwhile, specialty surfaces like crackle glazes, beveled profiles, or hand-shaped finishes introduce personality without dominating a design. Learn more about handmade ceramic tile techniques for artisanal options.
Grout Choice and Its Effect on Final Appearance
Beyond tile selection, grout significantly impacts both the aesthetic and durability of your project.
Regarding shade, a coordinating grout shade produces a unified effect, while a contrasting grout highlights each tile, accentuating pattern and flow, perfect for installations like herringbone or stacked arrangements.
Grout composition also contributes importantly to tile work. While cementitious grout sees common use, it frequently needs sealing to preserve its look and durability. Alternatively, epoxy grout delivers superior stain opposition and waterproofing, though it proves more demanding to install.
Furthermore, ensure grout matches your joint width. Unsanded grout works best for joints below 1/8", while sanded grout supplies better stability and shrinkage management for broader lines.
For detailed guidance, reference the grouting tile tutorial for professional techniques.
Evaluating Edge Details and Specialty Options
Finishing elements like edge details prove essential for a polished outcome. Rectified tiles, featuring precisely trimmed edges, permit narrower grout lines and a crisp, current profile. Cushion-edged tiles possess gentler, curved edges that complement traditional aesthetics.
To complete edges or transition across surfaces, integrate bullnose tiles, pencil liners, or chair rails. These components frame the installation and introduce definition around windows, recesses, and exposed ends.
Understanding bullnose tile applications helps create professional-looking finished edges.
For additional visual dimension, explore accent choices like mosaics, metallic accents, or hand-decorated tiles, which break up extensive installations and bring texture or color variation.
Consider terrazzo mosaic tile options to add artistic focal points within your subway tile design.
Complete Installation Process for Subway Tiles
Achieving that crisp, classic subway tile appearance depends on more than selecting appropriate tiles, it hinges on installation quality. With proper preparation, layout planning, and finishing methods, even a straightforward design achieves a professionally executed look and delivers years of performance.
For optimal outcomes, hiring seasoned tile contractors who guarantee precision and lasting results comes highly recommended.
Following Ceramic Tile Foundation installation resources ensures your project meets industry standards.
Surface Preparation
A stable base proves critical. Confirm the substrate remains clean, dry, and structurally intact, without grease, dust, or previous adhesive. Acceptable backing materials include cement backer board, moisture-resistant green board, or primed drywall in moisture-free zones.
Subsequently, verify level surfaces using a straightedge, and correct any variations exceeding 1/8" across 10 feet using a leveling compound.
In moisture-prone areas like showers or backsplashes, install a waterproofing membrane such as RedGard or Schluter Kerdi. Employ corrosion-resistant screws and tape all connections for a secure, moisture-defended foundation.
Planning the Tile Layout
Begin by locating a natural center point for your arrangement—typically the middle of a primary wall or aligned with a significant fixture like a range or vanity. From this point, employ a laser level or chalk line to create clean, level reference guides both horizontally and vertically.
These markers help maintain straight, balanced tile rows as you progress across the area. Consult NKBA planning guidelines for professional layout standards in kitchens and bathrooms.
Prior to applying any adhesive, perform a dry layout of one tile row to assess spacing and preview edge cuts. Aim to prevent finishing with narrow pieces, anything under one-third of a tile, as they disrupt visual continuity.
Tile spacers prove essential for maintaining uniform grout lines, with 1/16" delivering a sleek, current appearance and 1/8" creating a more classic finish.
For more complex patterns like herringbone or vertical stacks, investing time to measure precisely, or even develop a test layout, prevents errors and ensures a refined, expert outcome.
Discover creative possibilities through subway tile pattern layouts that showcase various arrangement styles.
Installing Adhesive and Positioning Tiles
With your layout established, prepare your adhesive. To initiate the installation, employ a modified thin-set mortar for dependable tile bonding, especially in damp or high-traffic zones. Mix to a smooth, peanut butter-like texture, permit it to slake, then remix prior to application.
Subsequently, distribute mortar using a 1/4"x1/4" notched trowel and comb in a single direction for complete coverage. For improved adhesion, back-butter larger tiles.
Then, position each tile with a gentle twist, aligning with layout guides and spacers. Regularly lift tiles to verify proper coverage, target 80% on walls, 95% in moisture-exposed areas. To avoid lippage, consider a leveling system.
Finally, allow the adhesive to cure for 24 hours before proceeding to grout.
Grouting and Protecting
After tiles are positioned and spacers extracted, mix your grout to a smooth texture. Apply unsanded grout for joints below 1/8", and sanded grout for broader gaps.
With grout prepared, start by spreading it diagonally using a rubber float, pushing firmly into joints. Clear excess at a 45-degree angle, and clean with a dampened sponge after 15–30 minutes. Rinse repeatedly to avoid haze.
Following curing (24–72 hours), apply a penetrating sealer to safeguard grout, particularly in kitchens and bathrooms. Natural stone tiles may need sealing before and after grouting.
As a closing step, finish with a soft cloth polish and check for overlooked areas or touch-ups. This approach ensures proper sealing boosts both durability and aesthetics.
Maintaining Your Subway Tiles to Preserve Their Appeal
Even highly durable materials benefit from consistent routine maintenance, and subway tiles prove no exception. With appropriate upkeep and prompt attention to typical concerns, you'll maintain their crisp, clean, and attractive appearance for years ahead.
However, always consult the manufacturer's maintenance instructions to confirm you're applying the safest and most effective care methods for your particular tile.
Routine Cleaning
After your subway tiles are installed, safeguarding their finish and longevity becomes the subsequent critical step. Begin with straightforward, regular cleaning using pH-neutral products.
For glazed ceramic or porcelain tiles, clean with a soft cloth or sponge and mild detergent to eliminate dust, grease, or soap residue. Skip acidic or alkaline cleaners like vinegar or bleach, which may damage grout or etch surfaces.
For high-gloss or glass tiles, a microfiber cloth and streak-free cleaner boost shine. In kitchens, apply tile-safe degreasers near cooking zones and rinse completely to avoid residue accumulation.
While glazed tiles typically require minimal maintenance, matte or unglazed choices, like natural stone or specialty surfaces, demand extra attention. Apply products designed for the particular material and avoid abrasives, which scratch or dull the finish.
Resolving Typical Problems
In heavily-used or humid spaces, grout discoloration, mildew, and occasional tile damage may emerge. To clean stained grout, apply a soft-bristle brush with an oxygenated bleach solution or grout-safe cleaner, never metal tools, which scratch or compromise the grout.
To prevent mildew in bathrooms or kitchens, maintain proper ventilation and use mildew-resistant grout or sealer. If mold develops, a diluted hydrogen peroxide solution proves effective and surface-safe.
For damaged tiles, whether from impact or structural movement, watch hairline cracks and replace compromised tiles quickly to prevent moisture infiltration.
More widespread cracking may necessitate a substrate evaluation by a tile contractor. Reference tile replacement techniques for step-by-step repair guidance.
Strategies for Extended Care and Protection
To maintain your tiles' optimal appearance for years forward, preventative maintenance proves essential. Install a penetrating grout sealer every 12–24 months, or more regularly in high-moisture areas, to defend against stains and water absorption. Reapply as necessary for sustained protection.
Don't neglect expansion joints and caulked connections. These flexible barriers accommodate movement where tile contacts tubs, counters, or windows.
Inspect them periodically and replace worn silicone with mildew-resistant caulk to prevent leaks and cracking.
As a concluding measure, protect your installation by using trivets, cutting boards, and rugs in active or work zones. Regular inspections and prompt repairs will maintain both the structure and appearance of your subway tile in optimal condition.
For comprehensive flooring care strategies, consult this bathroom flooring guide.
Classic Tile, Lasting Worth
Subway tiles consistently justify their position in design for solid reasons—they combine aesthetic precision with sustained performance. Whether you favor traditional white ceramic or contemporary formats in porcelain and stone, their flexibility renders them a dependable choice across styles and environments.
As you advance with your tile project, the proper selections in material, layout, and detail prove transformative.
Nova Tile and Stone stands ready to support you with reliable expertise crafted to realize your vision, beautifully and confidently.
Conclusion
Subway tiles deliver more than visual appeal, they represent a proven investment in quality, versatility, and lasting performance. Their journey from functional transit infrastructure to contemporary design essential demonstrates their remarkable ability to adapt while maintaining the core characteristics that made them popular over a century ago.
Whether you're renovating a kitchen backsplash, designing a bathroom retreat, or creating an accent wall that captures attention, subway tiles provide the foundation for achieving your vision.
Their straightforward installation process, minimal maintenance requirements, and compatibility with diverse design styles make them accessible for projects of any scale or budget.
The key to success lies in thoughtful selection and proper execution. By understanding material properties, choosing appropriate finishes, and following best installation practices, you'll create surfaces that perform beautifully for decades.
Remember that details matter from grout color selection to edge treatments and each decision contributes to the overall impact of your finished space.
Ready to bring your tile project to life? Browse our extensive subway tile collection to discover options that match your design vision perfectly.
Frequently Asked Questions
What's the difference between ceramic and porcelain subway tiles, and which should I choose?
Ceramic subway tiles are crafted from red or white clay with a glazed finish, making them easier to cut and more budget-friendly. They work perfectly for wall applications in kitchens and bathrooms. Porcelain tiles, however, are made from denser clay fired at higher temperatures, resulting in superior durability and water resistance with an absorption rate below 0.5%. Choose ceramic for standard wall installations where cost is a consideration, and select porcelain for high-moisture areas like shower floors, steam rooms, or any space requiring enhanced durability and water protection. To compare different materials and formats side-by-side, shop tiles by type and find the perfect option for your specific needs.
How do I prevent grout from staining or discoloring over time?
Grout protection starts with selecting the right type and applying proper sealers. Epoxy grout offers the best stain resistance and waterproofing, though it requires more skill to install. For standard cementitious grout, apply a penetrating sealer every 12–24 months, or more frequently in kitchens and bathrooms. Regular cleaning with pH-neutral products prevents buildup, and addressing spills promptly stops stains from setting. In high-moisture areas, ensure adequate ventilation and consider mildew-resistant grout formulations. These preventative measures will keep your grout looking fresh and clean for years. For additional care guidance and product recommendations, explore our collection where detailed information helps you maintain your investment.
Can subway tiles be used on floors, or are they only suitable for walls?
While subway tiles are traditionally used on walls, high-grade porcelain subway tiles are durable enough for floor applications. Their low absorption rate and dense composition make them suitable for flooring in bathrooms, laundry rooms, and other residential spaces. However, consider that the rectangular format may require more careful layout planning to avoid awkward cuts, and ensure you select tiles with appropriate slip resistance for floor use. For heavy-traffic commercial areas, consult with a tile professional to verify the specific product meets wear and safety requirements. When selecting tiles for different applications, shop tiles by style to find options specifically designed for your intended use.
What pattern should I choose for my subway tile installation?
Pattern selection depends on your design goals and space characteristics. The classic running bond (offset brick pattern) offers timeless appeal and works universally across styles. Herringbone creates dynamic visual interest and draws the eye, making it ideal for feature walls or backsplashes. Vertical stack elongates spaces and adds contemporary sophistication, perfect for shower walls or accent areas. Basketweave introduces texture and vintage charm suited to traditional designs. Consider your room's proportions, existing design elements, and personal style then dry-lay tiles before installation to visualize the final effect. Need expert advice on pattern selection or installation techniques? Contact us to discuss your project with our experienced design team.
How much maintenance do subway tiles require, and are they difficult to keep clean?
Subway tiles rank among the easiest surfaces to maintain. Glazed ceramic and porcelain versions feature smooth, non-porous surfaces that resist staining and require only regular wiping with mild detergent and water. Avoid acidic cleaners like vinegar or harsh alkaline products that can damage grout or etch finishes. For high-gloss tiles, a microfiber cloth prevents streaking and maintains shine. The primary maintenance involves grout care, seal it every 12–24 months and clean with appropriate products. Natural stone subway tiles need material-specific cleaners and more frequent sealing, but glazed options deliver virtually maintenance-free performance with minimal daily effort. Learn more about Nova Tile and Stone and our commitment to helping customers achieve beautiful, long-lasting tile installations.
Where can I see subway tiles in person before purchasing?
Seeing and touching tiles before making your final selection provides valuable insight into texture, color, and finish. Visit one of our convenient showroom locations when you shop local options to experience our complete range of subway tiles firsthand. Our knowledgeable staff can show you various sizes, colors, and finishes while answering questions specific to your project. We also carry a comprehensive range of complementary products we carry including grouts, adhesives, and finishing pieces to complete your installation with professional results.