Common subway tile installation mistakes include poor surface preparation, using wrong adhesive, inconsistent spacing, improper grout selection, and neglecting expansion joints. These errors cause tiles to crack, fall off, or look unprofessional, but all are preventable with proper planning and technique.
The seven most critical subway tile installation mistakes are:
- Skipping surface preparation - Installing on dirty, uneven, or damaged walls
- Using wrong adhesive - Applying inappropriate thinset or mastic for the application
- Poor layout planning - Starting installation without dry-fitting tiles first
- Inconsistent spacing - Failing to use tile spacers for uniform grout lines
- Wrong grout selection - Choosing incorrect grout type or color for the project
- Neglecting expansion joints - Forgetting flexible joints where tiles meet other materials
- Rushing curing time - Grouting before adhesive fully sets or using shower too soon
Whether you're planning a DIY kitchen backsplash or bathroom shower installation, understanding these common errors saves time, money, and frustration. At Nova Tile and Stone, we've seen countless installations across Northern Nevada and Northern California. Most problems are entirely preventable with proper planning. Take advantage of our free design consultations to discuss your installation plan before beginning your project.
Skipping Proper Surface Preparation
Poor surface preparation is the number one cause of subway tile installation mistakes, leading to tiles falling off, cracking, or developing lippage. Your substrate must be clean, flat, level, and structurally sound before installation begins. According to the Ceramic Tile Education Foundation, proper substrate preparation is critical for long-term tile performance.
Remove all dust, dirt, grease, and old adhesive from the surface. Even small amounts of debris prevent proper adhesion and create weak points. For kitchen backsplashes, thoroughly degrease walls to remove cooking oils and residue.
Check walls for flatness using a straightedge or level. Walls with bumps or dips cause tiles to mirror those imperfections, resulting in unsightly lippage where edges stick up. Apply a skim coat of joint compound to smooth minor imperfections, or install cement backer board shimmed to create flat, plumb surfaces.
Repair or replace water-damaged or unstable drywall before installation. In moisture-prone areas like bathrooms and showers, install cement backer board or apply waterproof membranes according to ANSI A137.1 standards for ceramic tile installations.

Using Wrong Adhesive or Applying It Incorrectly
Using inappropriate thinset mortar or mastic creates common subway tile installation mistakes that lead to tiles loosening or falling off. For wall applications like kitchen backsplashes, premixed mastic works well with standard ceramic subway tiles. However, moisture-exposed areas like showers require polymer-modified thinset mortar for superior water resistance and bond strength. Porcelain subway tiles need thinset specifically formulated for porcelain due to their low porosity.
Follow manufacturer instructions precisely when mixing thinset to achieve correct consistency. The mixture should have peanut butter-like consistency that holds peaks. Apply adhesive using proper trowel sizes: 1/4 inch square-notched trowels for standard 3x6 inch subway tiles, 3/8 inch notches for larger 4x12 or 4x16 formats. Hold trowels at consistent 45-degree angles to create uniform ridges.
Back-butter tiles by spreading thin thinset layers on tile backs in addition to walls. This ensures 95% coverage and eliminates hollow spots that cause cracking. Browse our tile selection by size to find the perfect format for your project.
Poor Layout Planning and Pattern Execution
Rushing installation without proper layout planning ranks among the most visible subway tile installation mistakes. Poor planning leads to awkward cuts, unbalanced patterns, and unprofessional appearances impossible to hide after grouting. Professional installers from the Tile Council of North America recommend always performing dry layouts before starting.
Perform dry layouts of entire installation areas before applying adhesive. Find wall center points and mark vertical and horizontal reference lines. Position reference lines to avoid ending with thin tile slivers at corners or edges. Tiles cut to less than one-third width look awkward and cheap.
Consider relationships between tile sizes and space dimensions. If measurements result in very small edge cuts, shift layouts slightly to create balanced cuts on both ends. For complex patterns like herringbone or vertical stack, mark layout lines clearly and double-check pattern alignment before setting tiles. Tile Letter Magazine offers excellent guidance on professional tile layout techniques.
Account for obstacles like outlets, windows, and cabinets during planning. Measure and mark these locations so you can plan cuts strategically. Explore our subway tiles by color to find the perfect shade for your design vision.
Inconsistent Spacing and Grout Line Issues
Inconsistent spacing between tiles creates noticeable subway tile installation mistakes, resulting in wavy, unprofessional looks that grouting emphasizes. Tile spacers are essential for achieving consistent grout joints. For most installations, 1/8 inch spacers work well and create clean, classic grout lines. The Certified Tile Installer program emphasizes proper spacing as fundamental to professional installations
Place spacers at every corner where tiles meet to ensure uniform horizontal and vertical spacing. Remove spacers before adhesive fully cures but after it sets enough that tiles won't shift, typically within a few hours. Spacers left in place prevent proper grout coverage and create weak spots.
Lippage occurs when adjacent tiles aren't set at the same height, creating edges that stick up or dip down. This results from uneven adhesive application, failure to check tile placement with levels, or installing over uneven substrates. Press each tile firmly into adhesive and use levels to ensure flush placement with surrounding tiles. Tile leveling systems provide excellent insurance against lippage.
Work in small sections and frequently step back to view installations from different angles. Catch alignment issues while adhesive remains workable for quick corrections. Browse products we carry to find professional-grade installation tools and accessories.
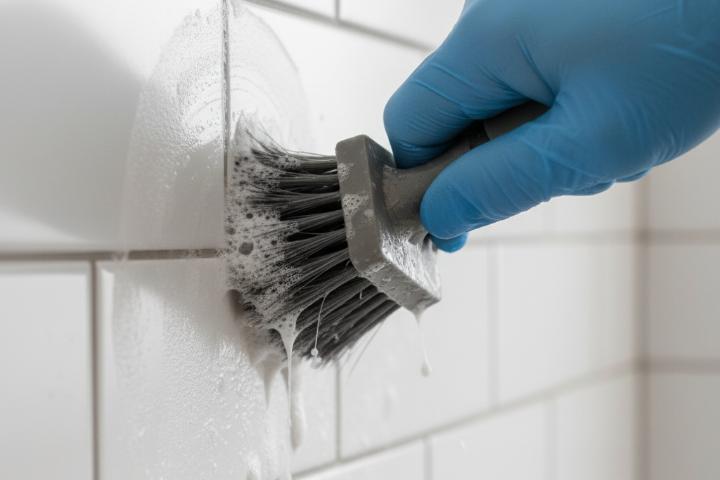
Choosing Wrong Grout Color or Type
Grout selection significantly impacts both appearance and durability, yet many treat it as an afterthought. Choose between sanded and unsanded grout based on joint width. Grout joints 1/8 inch or wider require sanded grout, which contains fine sand particles that prevent shrinkage. For narrower joints, use unsanded grout for smoother finishes.
In high-moisture areas like showers, epoxy grout offers superior water resistance and stain protection compared to cement-based grouts. While more expensive and challenging to work with, epoxy grout won't discolor and requires no sealing. The National Kitchen & Bath Association recommends epoxy grout for all wet areas where durability matters most.
Grout color dramatically affects visual impact. Matching grout to tile color creates seamless appearances that make spaces feel larger. Contrasting grout, like dark gray with white subway tiles, defines each tile individually and creates bold statements. Remember that high-contrast grout highlights installation imperfections. Check out our tile styles gallery for inspiration on grout color combinations.
Test grout colors before committing to entire installations. Purchase small amounts and apply to sample boards. Let grout fully cure as colors lighten significantly during curing.
Neglecting Expansion Joints and Rushing Curing
Forgetting expansion joints is an overlooked subway tile installation mistake. Buildings naturally expand and contract with temperature changes and settling. Without properly placed expansion joints, these movements create stress that cracks tiles and causes grout failure. Professional standards from the Natural Stone Institute specify exact placement requirements for expansion joints.
Install expansion joints where tile meets different materials, at changes in plane, and along perimeters of large installations. For residential applications, place expansion joints at 12 to 16-foot intervals. Fill these joints with flexible caulk matching grout color rather than rigid grout.
In showers, joints where wall tile meets shower pans or bathtubs should always be caulked, never grouted. Similarly, where wall tile meets kitchen countertops, use caulk to accommodate movement between materials.
After setting tiles, allow adhesive to cure for at least 24 hours before grouting. Some thinset formulations require up to 72 hours. Once grouting is complete, avoid getting grout joints wet for 48 to 72 hours. After cement-based grout fully cures, apply penetrating grout sealers to protect against stains and moisture penetration. Visit our showroom locations for expert advice on proper installation techniques.
Working with Right Tools and Materials
Using inadequate tools increases the likelihood of making costly subway tile installation mistakes. Quality tile saws with diamond blades make precise, clean cuts essential for professional installations. Additional essential tools include notched trowels in appropriate sizes, tile spacers, levels, measuring tape, grout floats, sponges, and safety equipment. Family Handyman provides comprehensive guides on selecting the right tools for tile projects
Quality matters when selecting materials. Cheap thinset or grout can lead to failures requiring complete removal and reinstallation. Purchase products from reputable manufacturers and follow their mixing and application instructions precisely. Explore our complete tile shop to find quality materials and tools for your installation. For unique designs, check out options like our Linear 5x10 Glossy 3D Decorative Subway Tile or 3x12 Matte Porcelain Subway Tile for modern aesthetics . At Nova Tile and Stone's four showroom locations in Reno, Minden, Sacramento, and Fernley, our experts help you select the right materials for your specific project requirements.
Conclusion
Avoiding common subway tile installation mistakes requires careful planning, proper surface preparation, quality materials, and attention to detail throughout every process step. The most critical success factors include thoroughly preparing substrates, using appropriate adhesive applied correctly, planning layouts before setting tiles, maintaining consistent spacing with tile spacers, selecting right grout types and colors, incorporating expansion joints, and allowing proper curing time.
For DIY installers, start with smaller, less visible projects to develop skills before tackling prominent installations. Practice techniques, work methodically, and don't rush the process. Industry events like Coverings showcase the latest tile installation innovations and techniques worth learning from industry professionals. Nova Tile and Stone offers free design consultations to help avoid these common mistakes. Learn more about us and our commitment to quality installations. Visit any of our four Northern Nevada and Northern California showroom locations, or explore our terrazzo-look tiles for unique design alternatives. With proper planning and execution, your subway tile installation will look beautiful and perform flawlessly for decades to come.
Featured Products
Frequently Asked Questions
What is the most common mistake when installing subway tiles?
Poor surface preparation is the most common subway tile installation mistake. Installing tiles over dirty, uneven, or damaged surfaces leads to adhesion failures, cracking, and lippage. Always ensure your substrate is clean, flat, level, and structurally sound before beginning installation. Taking time to properly prepare the surface prevents most installation problems and ensures long-lasting results.
Should I use sanded or unsanded grout for subway tile?
The choice between sanded and unsanded grout depends on your grout joint width. For joints 1/8 inch or wider, use sanded grout, which contains fine sand particles that prevent shrinkage in wider spaces. For joints narrower than 1/8 inch, use unsanded grout for a smoother finish. Most standard subway tile installations with 1/8 inch spacing work well with sanded grout.
How long should I wait before grouting subway tiles?
Wait at least 24 hours after setting tiles before grouting to allow the adhesive to cure properly. Some thinset mortars require up to 72 hours, especially in cool or humid conditions. Check your specific product's instructions for exact timing. Grouting too soon can dislodge tiles or create weak bonds that lead to installation failure.
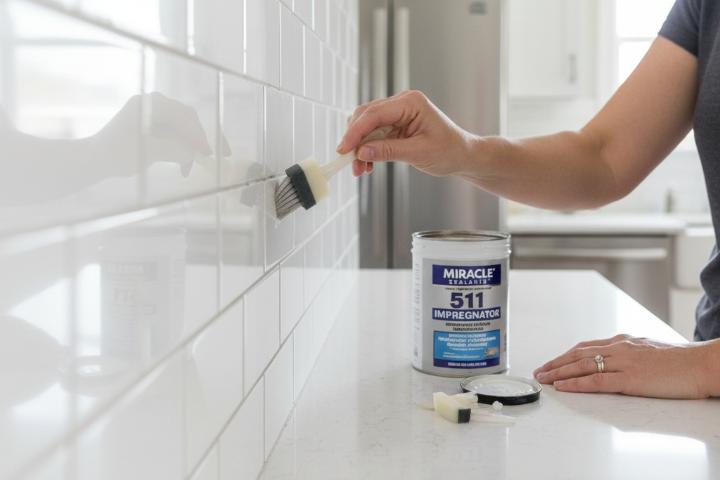
Do I need to seal subway tiles and grout?
Glazed ceramic and porcelain subway tiles don't require sealing, but cement-based grout does need sealing to protect against stains and moisture. Apply a penetrating grout sealer after the grout fully cures, typically 48 to 72 hours after application. Natural stone subway tiles also require sealing according to manufacturer recommendations. Reapply sealer annually in high-use areas.
Can I install subway tiles without using spacers?
No, tile spacers are essential for achieving consistent grout lines and professional results. Attempting to "eyeball" spacing or maintain even joints without spacers is one of the most common subway tile installation mistakes. Spacers ensure uniform gaps between tiles, prevent tiles from shifting as adhesive cures, and create the clean, straight grout lines that define quality installations.