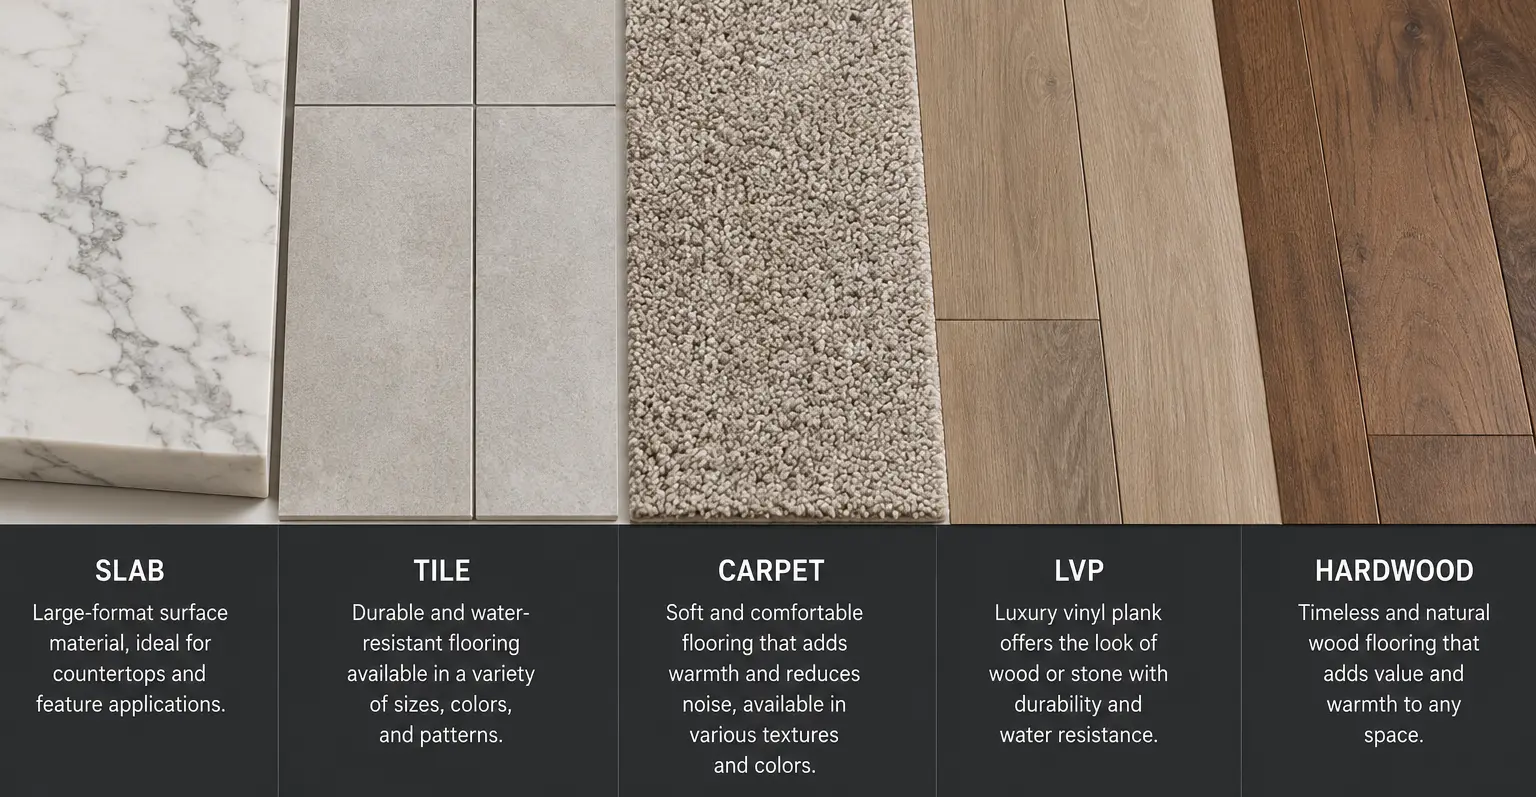
Comparing material samples before a remodel means testing physical pieces of tile, stone, hardwood, LVP, laminate, or carpet in your actual home, under your lighting, against your existing surfaces, and over at least 24 hours, before placing any order. It is the most reliable way to avoid material choices that look right in a showroom but wrong once installed.
In Reno, this step matters more than in many other markets. At 4,400 feet in a high desert valley, homes here receive intense, direct sunlight for more than 250 days a year, with afternoon humidity that regularly drops below 30 percent in summer and daily temperature swings that can exceed 40 degrees. Those conditions change how materials look, how they perform, and how they hold up. A countertop slab that reads as a cool white in a showroom may shift to warm cream under afternoon sun through a south-facing window.
This guide covers how to compare samples at home for every major material category: countertop slabs, tile, hardwood, LVP, laminate, and carpet.
What Samples Actually Reveal
A sample tells you four things a showroom visit cannot identify: how a material reads under your specific lighting, how it sits alongside the finishes already in your space, how it feels underfoot or to the touch in a familiar environment, and whether it holds up visually after you have lived with it for a day or two.
Light is the most variable factor. Warm pendant lighting pulls out gold and amber tones in stone. Cool north-facing windows flatten color and sharpen contrast. A material that looks balanced in one room may read completely differently in another, even in the same house. The only way to know is to test in place.
Adjacency is the second variable. No swatch board at a showroom can replicate the exact combination of your cabinet finish, wall color, existing flooring, and furniture. Undertone mismatches, where a stone leans warm and cabinetry leans cool, often go unnoticed until installation. A sample held in context catches those conflicts before they are permanent.
How to Compare Countertop Samples at Home
Position the sample where it will live
Place your countertop sample flat on the actual surface rather than propping it against a wall. Stone looks different horizontally than vertically because of the way light rakes across veining and mineral deposits. If you are evaluating a kitchen counter, lay the sample on the existing surface. If you are comparing bathroom vanity options, put it on the vanity.
Test under every light condition
Most kitchens have a mix of natural light and artificial sources. Check your sample in the morning when daylight is cooler and more directional, at midday under full sun if the room receives it, and in the evening under your overhead and task lighting. Warm bulbs in the 2,700K range pull out gold and cream tones in beige stones. Cooler LED bulbs in the 4,000K range emphasize gray and white. If a sample only looks right under one condition, that is worth knowing before you commit.
Bring your other materials into the comparison
Hold your cabinet door sample, any slab you are considering, and a paint chip against the countertop sample at the same time. The goal is to check whether the undertones are compatible. Warm undertones, those with hints of gold, cream, or brown, tend to work best when the surrounding materials share that warmth. Cool undertones, leaning toward gray, blue, or pure white, tend to pair better with cooler surroundings. A mismatch in undertones is one of the most common causes of a kitchen or bathroom that feels slightly off without anyone being quite sure why.
Do not compare too many samples at once
More than four or five countertop samples in the same space creates visual noise. Narrow down to your strongest candidates before testing at home, and compare them individually against your existing surfaces rather than stacking them against each other. When samples sit next to each other, they borrow undertones from their neighbors, which makes accurate evaluation harder.
How to Compare Tile Samples at Home
Countertop samples test one surface. Tile can end up on floors, walls, shower enclosures, entryways, and outdoor areas, which means the variables shift depending on where and how it will be used.
Lay it on the floor, not on a countertop
If you are evaluating floor tile, put the sample on the floor. The reflectivity and color behavior of a floor tile are determined by the angle at which light hits a horizontal surface, which is quite different from what you see when a sample is propped upright against a wall.
Think about grout before you decide on tile
The sample you bring home will not include a grout joint, but grout color substantially changes how a finished floor reads. A light grout with a dark tile highlights the grid pattern. A tone-matched grout creates a more continuous surface. If you are uncertain, ask to see a grouted mock-up at the showroom before making a final call.
Check the finish for wet area requirements
Tile used in wet areas needs to meet minimum slip resistance thresholds. The DCOF (dynamic coefficient of friction) minimum for residential wet areas is 0.42 under ANSI A326.3, and shower floors require 0.50 or higher. Matte and textured finishes generally meet these thresholds more readily than polished finishes. If you are comparing a polished tile against a matte option for a shower or bathroom floor, the finish decision carries functional weight alongside the aesthetic one.
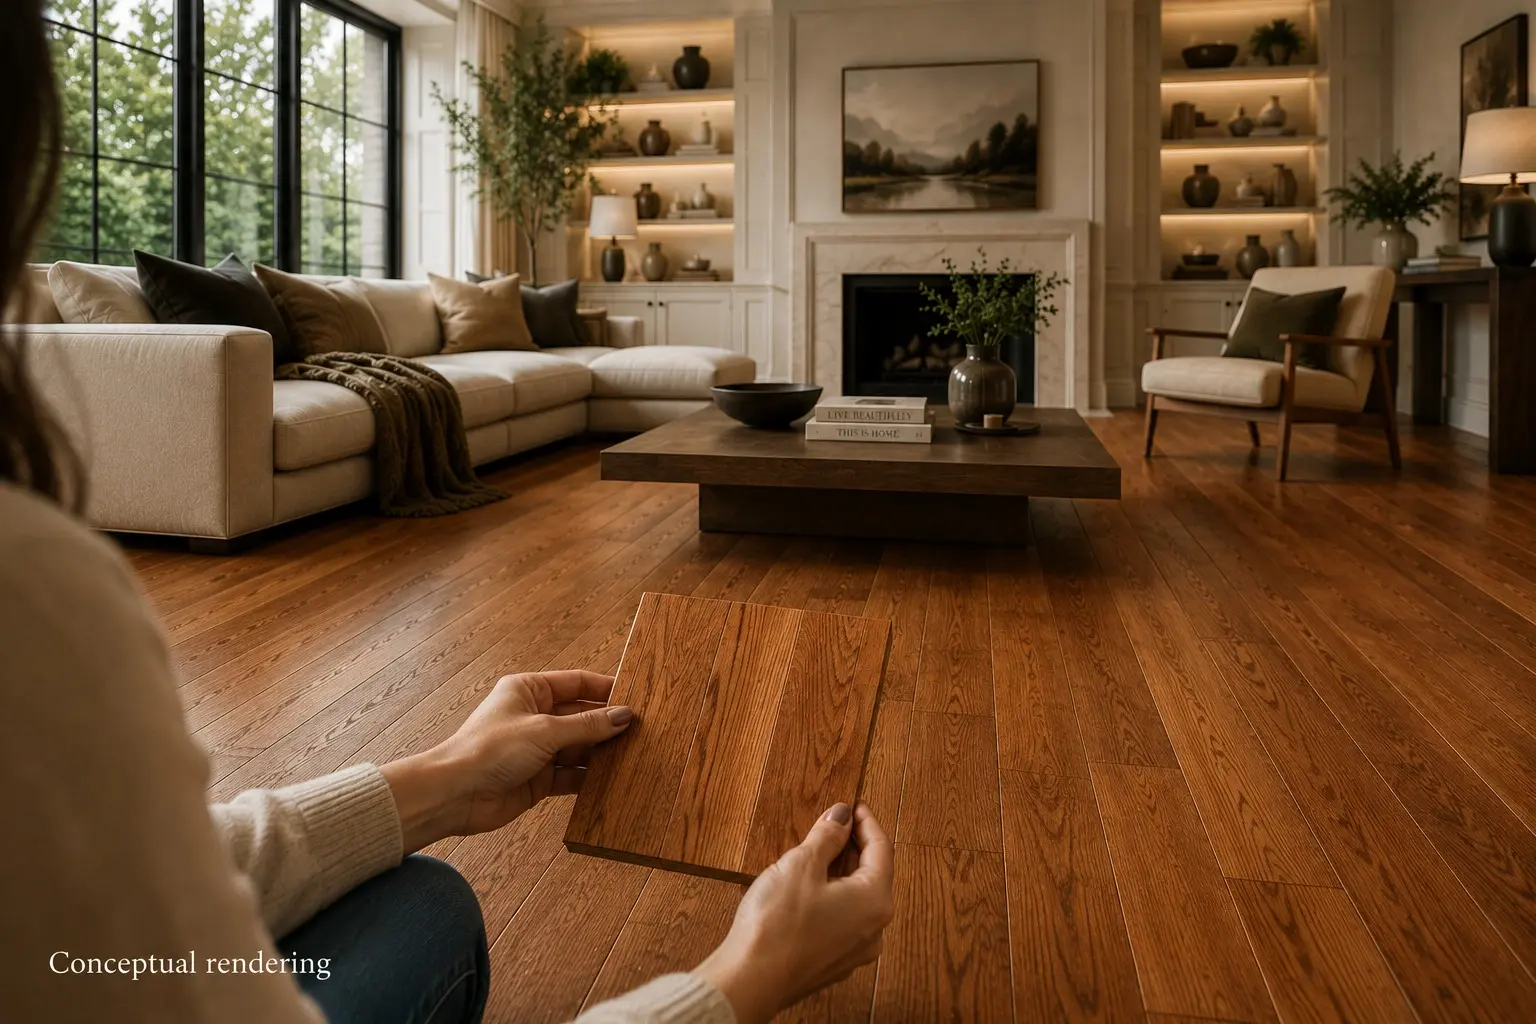
How to Compare Hardwood Samples in a Reno Home
Hardwood is one of the more nuanced materials to sample because it responds to light, humidity, and the other wood tones already present in a room.
Let the sample acclimate first
Before making any judgments, let hardwood samples sit in the room for at least 24 hours. Wood is hygroscopic, meaning it responds to the moisture content of its environment. Average afternoon humidity in the Reno area regularly falls below 30 percent in summer, which can cause wood to contract slightly. An acclimated sample gives you a more accurate picture of how the material will settle over time.
Check it against existing wood tones
If your kitchen has wood cabinetry or your living area has wood furniture, the flooring needs to work with those tones, not fight them. Too close a match can make a space feel flat. Too much contrast can feel disconnected. A slight variation in tone or grain scale is generally easier to live with than an exact match or a sharp clash.
Test the finish underfoot
Run your hand across the sample and then walk on it. A wire-brushed or hand-scraped finish feels and looks different from a smooth factory finish. In high-traffic areas, a textured finish tends to be more forgiving of everyday scuffs and the fine grit that blows in through doors in a high desert climate.
How to Compare LVP and Laminate Samples in a High Desert Climate
LVP and laminate are the most performance-driven materials in this guide, and sampling them is less about visual fit than about physical behavior. Both handle temperature fluctuation better than solid hardwood and are worth considering in rooms that see wide seasonal swings. Quality LVP is fully waterproof, making it suitable for bathrooms and laundry rooms where hardwood is not appropriate.
Test thermal behavior in the actual room
Leave the sample in the room for a full day and check whether it feels comfortable underfoot both in the morning, when indoor temperatures are lower, and in the afternoon. LVP can be sensitive to intense direct sunlight through glass, which raises localized surface temperatures significantly. If a room receives strong afternoon sun through large windows, check the product's heat tolerance specifications before deciding. Nevada's low humidity and high solar intensity make this a practical consideration rather than a theoretical one.
Evaluate texture and thickness honestly
LVP and laminate vary considerably in wear layer thickness, texture depth, and locking system quality. Walk across the sample in socks and in everyday shoes. Thicker products with a more pronounced texture tend to feel more substantial and show less wear over time. A hollow or bouncy feel underfoot usually signals a thin wear layer or a product that will need significant underlayment to perform well.
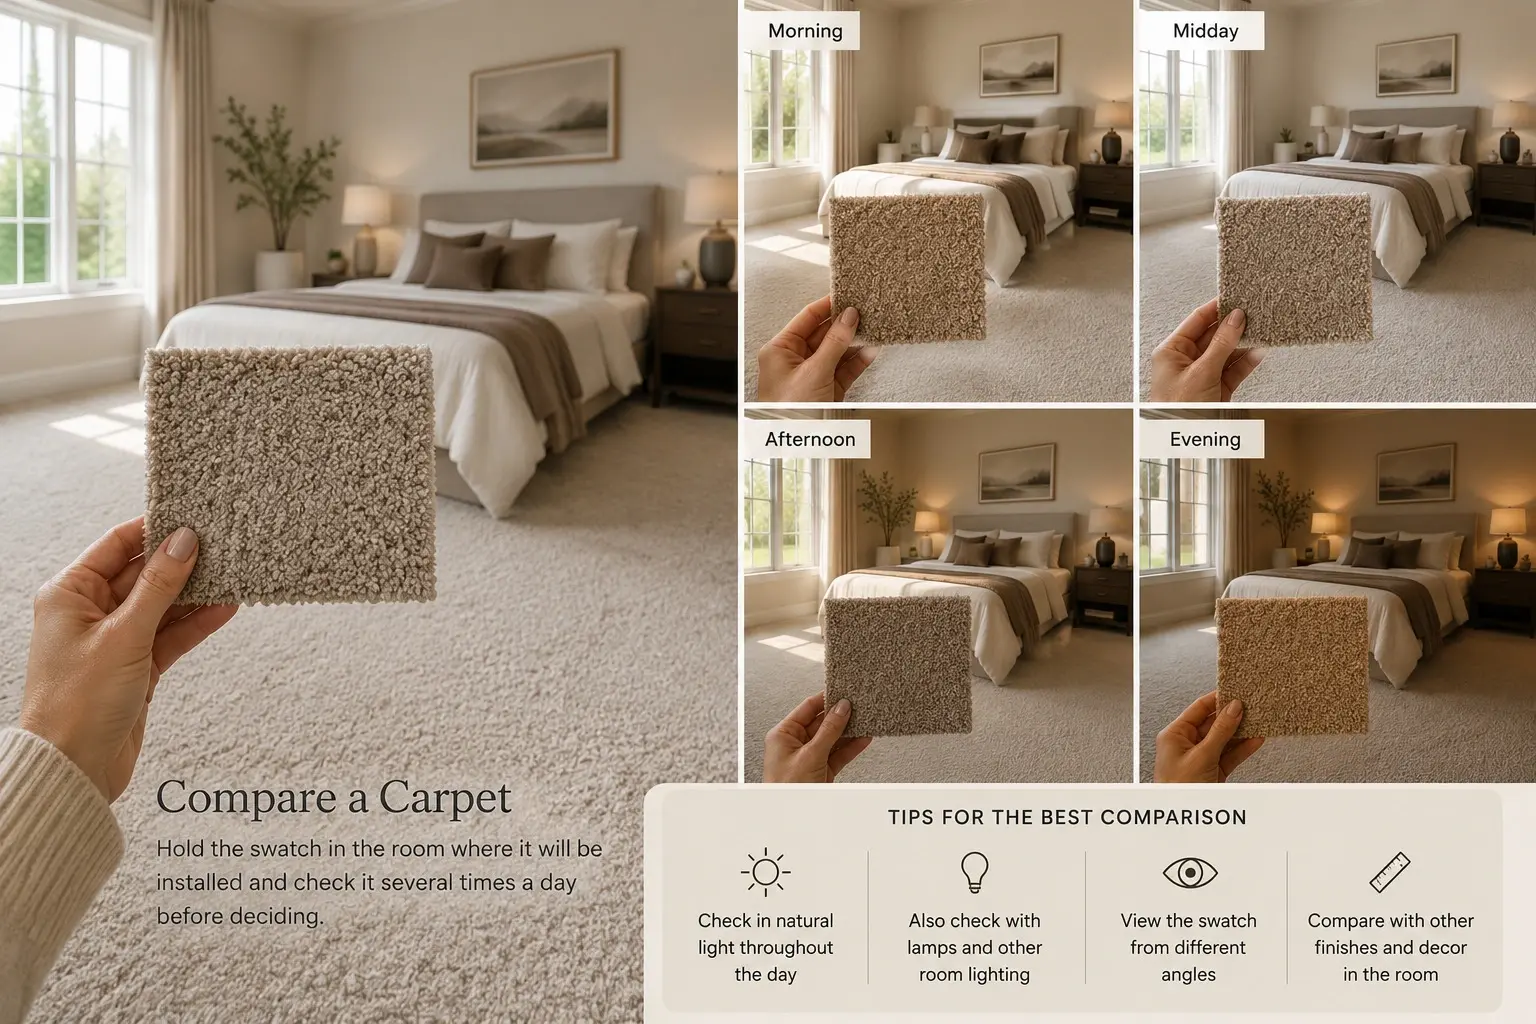
How to Compare Carpet Samples at Home
Carpet is the most tactile flooring material, and a sample swatch tells you more than any photo or in-store display can.
Test it in the room's actual light
Carpet color shifts noticeably between natural and artificial light sources, particularly in rooms with warm incandescent or amber LED lighting. Hold the swatch in the room where it will be installed and check it several times a day before deciding.
Match fiber type to how the room is used
Polyester carpet fibers are naturally more stain-resistant than nylon, making them a practical choice for bedrooms and lower-traffic spaces. Nylon leads on durability and pile resilience, recovering better in hallways and living areas that see regular foot traffic. Wool offers strong natural performance, including moisture resistance and thermal regulation, but at a higher price point. The right choice depends more on how the room functions than on appearance alone.
Test pile recovery
Press your thumb firmly into the sample, then release it. A dense carpet with good fiber quality will recover its pile fairly quickly. A sample that stays compressed is a reasonable indicator of how that carpet will look after a few years of regular use.
Conclusion
The most efficient approach is to use a showroom visit to build a shortlist, then do your final testing at home. Bring a cabinet door, a paint chip from your wall color, and photos of the space you are working with. Seeing a full countertop slab in person, rather than a small chip, is particularly useful for natural stone, where veining and color movement vary across the length of a single piece.
Once samples are home, work through these steps before making any final decision: place each sample in the actual room, in the orientation it will be installed; check it in morning, midday, and evening light; hold it against your cabinet finish, existing flooring, and wall color; for flooring, walk across the sample in your everyday footwear; and narrow down to two or three finalists before committing.
At Nova Tile and Stone in Reno, the showroom carries countertop slabs in natural stone, quartz, sintered stone, and porcelain, alongside tile, hardwood, LVP, laminate, carpet, and exterior stone. Tile samples are available to take home through the $1 sample program. The showroom is located at 12835 Old Virginia Road and serves homeowners throughout Reno, Sparks, Spanish Springs, Sun Valley, Washoe Valley, Verdi, and Incline Village. It is open Monday through Friday from 7:30 a.m. to 6:00 p.m. and Saturday from 9:00 a.m. to 3:00 p.m. Schedule a design consultation through our website to discuss your project and material selections.
Frequently Asked Questions
Two to four is a practical range. Fewer than two makes meaningful comparison difficult. More than five tends to create decision fatigue, particularly once you start evaluating samples against your existing materials in the space.
For tile and smaller format materials, sample programs let you take pieces home before purchasing. For countertop slabs, the most useful step is viewing the actual slab in person at the showroom, where you can assess the full movement and character of the stone, then testing a sample chip at home for undertone and lighting behavior before finalizing.
It can. The low humidity common in the Reno area puts more stress on solid hardwood than engineered hardwood or LVP, both of which handle moisture fluctuation with greater dimensional stability. For rooms with intense afternoon sun through west-facing glass, checking the heat tolerance specifications for any LVP product you are considering is a worthwhile step.
DCOF stands for dynamic coefficient of friction and measures how slip-resistant a tile surface is under wet conditions. The minimum threshold for general residential wet areas is 0.42 under ANSI A326.3. Shower floors require 0.50 or higher. Matte and textured finishes are generally easier to achieve than polished finishes.
The Reno location carries the full range covered in this guide: natural stone, quartz, sintered stone, and porcelain slabs, along with tile, hardwood, LVP, laminate, carpet, and exterior stone. Design consultations are available by appointment.
Note: Some images on this page may be conceptual renderings created to illustrate design possibilities and may not depict actual installations.